
Mounting a SimpliSafe Glassbreak Sensor is easy, but choosing the right location matters much more than simply getting the sensor to stick to the wall. Unlike an Entry Sensor, the Glassbreak Sensor does not attach to the window itself. It listens for the specific sound pattern produced when window glass is struck and broken, so it needs to be positioned where it can clearly hear the windows you want to protect.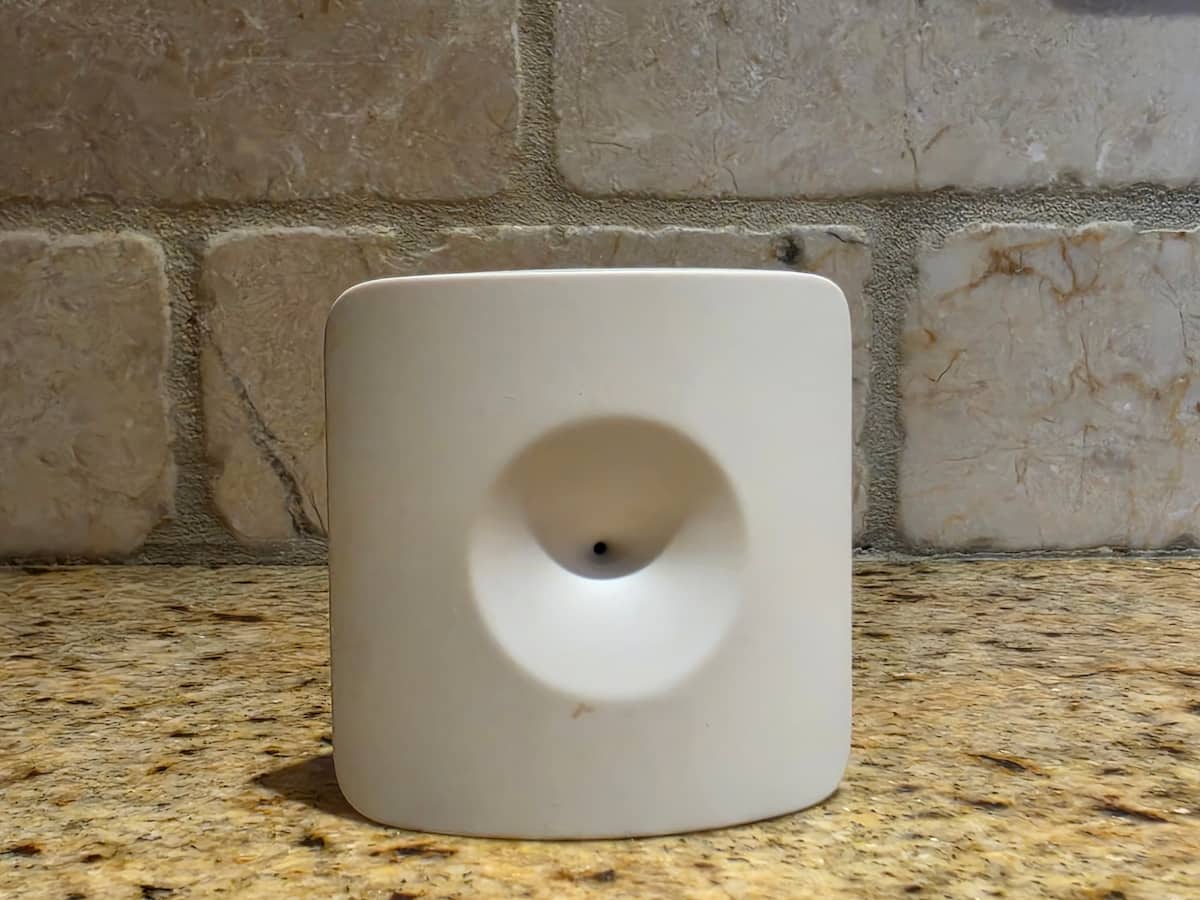
SimpliSafe Glassbreak Sensor
If you are wondering how to mount a SimpliSafe glass break sensor, this guide covers both the physical installation and the more important question of where it should go. We will look at distance from the windows, wall versus shelf placement, adhesive versus screws, curtains, testing, and a few mounting mistakes worth avoiding.
If you are installing several components at the same time, you may also want our guides on how to mount a SimpliSafe Entry Sensor and how to mount the SimpliSafe Keypad.
Where Should a SimpliSafe Glassbreak Sensor Be Mounted?
Placement is the most important part of the installation. SimpliSafe recommends positioning the current Glassbreak Sensor within 20 feet of the windows you want to protect and orienting the sensor so that it faces the glass.
That gives you considerably more flexibility than an Entry Sensor. For example, a living room with several windows or a sliding glass door may be covered by one properly positioned Glassbreak Sensor rather than placing a sensor on every piece of glass.
The sensor can be mounted directly to a wall, or it can sit on the edge of a stable flat surface. Wall mounting generally gives you the cleanest permanent installation and reduces the chance of someone accidentally moving the sensor later.
What If the Windows Have Heavy Curtains?
Curtains can interfere with the sound reaching the sensor. SimpliSafe recommends positioning the Glassbreak Sensor approximately 5 to 10 feet from windows with heavy curtains rather than using the full 20-foot distance.
This is worth paying attention to with blackout curtains, heavy drapes, or rooms where curtains cover most of the glass. Fabric absorbs sound, so a location that works perfectly with bare glass may not be ideal when thick curtains are closed.
Wall Mount or Put It on a Shelf?
You have two good options.
Wall mounting is my preference for most installations. Once you find a location that tests well, the sensor stays exactly where you put it. It also keeps the device away from kids, pets, vacuum cleaners, and the everyday clutter that tends to accumulate on shelves.
Shelf or tabletop placement is useful when you are still experimenting with positioning or do not want adhesive or screw holes in the wall. The sensor does not have to be permanently attached to operate.
If you start with shelf placement, test the sensor thoroughly before committing to a permanent wall location.
Why the Sensor’s Shape Works So Well in a Corner
Look at the back of the Glassbreak Sensor and the design makes more sense. It is not a flat rectangle. The body has two side panels that flare back at a slight angle, each with its own adhesive strip, with the battery and mounting screw holes centered between them.
That two-panel shape means the sensor was built with corner placement in mind. Where two walls meet at a 90-degree angle, each flared side panel presses flat against a different wall, so both adhesive strips make full contact instead of one edge of the sensor floating off a flat surface. It also happens to be a smart placement choice for coverage. A corner near the ceiling or partway up the wall gives the sensor a clear, centered line toward multiple windows in the room, which lines up with the earlier advice to aim for one central spot rather than a location tucked beside a single window.
You do not have to use a corner. The sensor mounts just as well flat against a single wall using both adhesive strips side by side. But if you have a corner within range of your windows, it is worth using, since the sensor is shaped for exactly that.
How to Mount a SimpliSafe Glass Break Sensor With Adhesive
The sensor includes an adhesive-backed mounting plate, making this the easiest installation method for most painted interior walls.
- Choose a location within the recommended distance of your windows.
- Make sure the Glassbreak Sensor will face toward the glass.
- Clean the wall with rubbing alcohol or another suitable alcohol-based cleaner.
- Allow the wall to dry completely.
- Remove the protective backing from the adhesive.
- Position the mounting plate carefully before pressing it onto the wall.
- Press and hold it firmly against the wall for approximately 30 seconds.
- Make sure the sensor is securely seated on its mounting plate.
Do not rush the cleaning step. Dust, oils, moisture, and residue are common reasons adhesive-mounted sensors eventually fall from the wall.
Replacing Worn or Used Adhesive
If you are moving an existing Glassbreak Sensor, do not expect the old adhesive to work as well the second time. Fresh adhesive is cheap insurance against finding your sensor lying on the floor one morning.
For a removable alternative, Command Medium Picture Hanging Strips are useful around the house for lightweight sensors and similar devices. The strips can be trimmed when necessary, although you should make sure they do not interfere with removing the sensor from its mounting plate.
If you prefer a stronger bond and are comfortable with a more permanent adhesive, Scotch-Mount Indoor Double-Sided Mounting Tape is another option. Keep in mind that stronger mounting tape may damage paint when it is eventually removed, so I would not make this my first choice on a finished wall.
How to Screw-Mount the Glassbreak Sensor
Screws are a better choice when you want a permanent installation, when the wall surface is textured, or when adhesive has already failed.
Slide the Glassbreak Sensor upward and off its mounting plate. The plate can then be fastened to the wall with the included screws. Once the bracket is secure, slide the sensor back onto it.
On drywall, the Glassbreak Sensor is so light that you generally do not need heavy-duty mounting hardware. If the included screw cannot obtain a secure bite in your particular wall, use an appropriately sized drywall anchor rather than installing an oversized anchor intended for shelves or televisions.
Screw mounting also makes future battery changes easy because the sensor body still slides off the bracket while the bracket remains attached to the wall.
Does the Sensor Need to Be Mounted Next to the Window?
No. This is probably the most common misunderstanding about Glassbreak Sensor placement.
An Entry Sensor detects whether a specific window or door has physically opened, so it must be mounted directly to that window or door. A Glassbreak Sensor works differently. Its microphone listens for the acoustic signature of breaking glass.
That means the Glassbreak Sensor belongs in the room facing the windows, not stuck onto the glass or window frame.
This is also why one Glassbreak Sensor may protect several windows within the same room, assuming they all fall within the sensor’s effective range and there are no major sound-blocking obstacles.
For windows where you also want to know whether someone simply opens the window rather than breaks it, consider using both technologies. Our SimpliSafe Entry Sensor mounting guide explains how those sensors should be installed.
What Type of Glass Does It Detect?
The current SimpliSafe Glassbreak Sensor is intended for standard single- and double-pane window glass. SimpliSafe says it is not designed for laminated, anti-smash, shatterproof, or similar specialty glass.
That distinction matters. If you have security glass, hurricane-rated laminated windows, or another specialty glazing system, do not assume a Glassbreak Sensor will provide the same protection as it would with ordinary window glass.
Keep It Away From Sources of Wireless Interference
Physical placement affects more than glass detection. The sensor also needs to communicate reliably with the SimpliSafe Base Station.
SimpliSafe recommends keeping the Glassbreak Sensor and Base Station several feet away from potential sources of RF interference such as Wi-Fi routers, large televisions, major appliances, baby monitors, weather stations, some LED lighting, and garage door equipment.
You do not need to redesign your room around this rule, but avoid putting the sensor directly beside a router or large electronic device when another mounting location is available.
Test the Sensor Before Calling the Installation Finished
This is the step I would not skip.
Put your SimpliSafe system into Test Mode and press the button on top of the Glassbreak Sensor. SimpliSafe’s test procedure temporarily allows the sensor to respond to a hand clap.
Move to the area near the window you want protected and clap once. If the placement is good, the Base Station should identify the Glassbreak Sensor.
Do the test from several areas around the protected windows rather than testing from one convenient spot beside the sensor. That gives you a much better idea of whether the placement covers the entire area you expect it to protect.
What Battery Does the SimpliSafe Glassbreak Sensor Use?
The current Glassbreak Sensor uses a single CR123A 3V lithium battery. SimpliSafe estimates battery life at up to roughly three years depending on placement and usage.
Keeping a spare battery around is worthwhile, especially if you have several security devices using the same battery size. The Rapthor CR123A 3V Lithium Battery is an excellent replacement option.
To access the battery, slide the sensor body up and off the mounted bracket. This is another reason not to cover the sensor or bracket with a large piece of mounting tape. You want to retain normal access to the removable sensor body.
Need Another SimpliSafe Glassbreak Sensor?
If you have windows in separate rooms, one sensor usually cannot cover the entire house simply because the rooms are separated by walls and distance. In that situation, adding another SimpliSafe Glassbreak Sensor may make more sense than trying to stretch the coverage of one sensor beyond its intended range.
Common SimpliSafe Glassbreak Sensor Mounting Mistakes
Mounting it directly beside one window. The sensor does not need to live on the window frame. A more central location may cover several windows.
Pointing it away from the glass. The sensor should face toward the windows it is intended to protect.
Mounting too far away. Stay within the recommended 20-foot range, and closer when heavy curtains are involved.
Putting it behind furniture or curtains. Objects that obstruct or absorb sound can reduce the effectiveness of the placement.
Applying adhesive to a dirty wall. Clean and dry the mounting surface first.
Using excessively strong adhesive. The sensor is lightweight. There is rarely a reason to use an adhesive capable of tearing drywall paper or paint from the wall.
Not testing after installation. A sensor that looks perfectly positioned is not necessarily positioned correctly. Test it.
Frequently Asked Questions
How far can a SimpliSafe Glassbreak Sensor be from a window?
SimpliSafe recommends keeping the sensor within 20 feet of the windows you want to protect. With heavy curtains, moving it within approximately 5 to 10 feet is recommended.
Can a SimpliSafe Glassbreak Sensor cover multiple windows?
Yes. A correctly positioned sensor can monitor multiple windows within its detection area. This is one of the major advantages of a Glassbreak Sensor compared with installing an Entry Sensor on every individual window.
Can I put a SimpliSafe Glassbreak Sensor on a shelf?
Yes. It can sit on a stable flat surface rather than being permanently mounted. Just make sure it faces toward the windows and remains within the recommended detection range.
Can I mount the Glassbreak Sensor on the ceiling?
The normal installation is on a wall or flat surface where the sensor can face the protected windows. A wall location is generally the more straightforward choice because you can orient the microphone toward the glass and test its coverage easily.
Should I use screws or adhesive?
Either works. Adhesive is faster and avoids wall holes. Screws are preferable for a permanent installation or on surfaces where adhesive does not hold reliably.
Does the Glassbreak Sensor replace window Entry Sensors?
Not necessarily. They detect different events. An Entry Sensor detects a window being opened, while the Glassbreak Sensor listens for breaking glass. Using both can provide two different types of protection.
Other SimpliSafe Mounting Guides
- How to Mount a SimpliSafe Entry Sensor
- How to Mount the SimpliSafe Keypad
- How to Mount a SimpliSafe Entry Sensor on a Door Frame
- How to Remove a SimpliSafe Entry Sensor
- SimpliSafe SimpliCam Mounting Options
Final Thoughts
The physical installation of a SimpliSafe Glassbreak Sensor only takes a few minutes. The important part is choosing the right location before attaching it permanently.
Keep the sensor within 20 feet of the windows, move it closer when heavy curtains are present, point it toward the protected glass, and test the location before considering the job complete. For most homes, the included adhesive is perfectly adequate on a clean smooth wall. Screws are the better option when you want a permanent installation or are dealing with a surface that does not hold adhesive reliably.
Get those basics right and the Glassbreak Sensor is one of the easier SimpliSafe devices to mount properly.