
Reolink’s PoE bullet cameras, the RLC-510A, RLC-1212A, RLC-810A, and the newer RP-PCB12M, all share the same slim cylindrical body and the same mounting base, which means the way you mount a Reolink bullet camera barely changes from one model to the next. What changes is where you want to put it: a flat wall, a house corner, vinyl siding you would rather not drill into, or a gutter edge. This guide walks through the mounting hardware that works well for this camera family, starting with Reolink’s own accessories and moving into a few no-drill alternatives worth knowing about. For a look at Reolink’s battery-powered line instead, see our guide to Reolink Argus mounts.
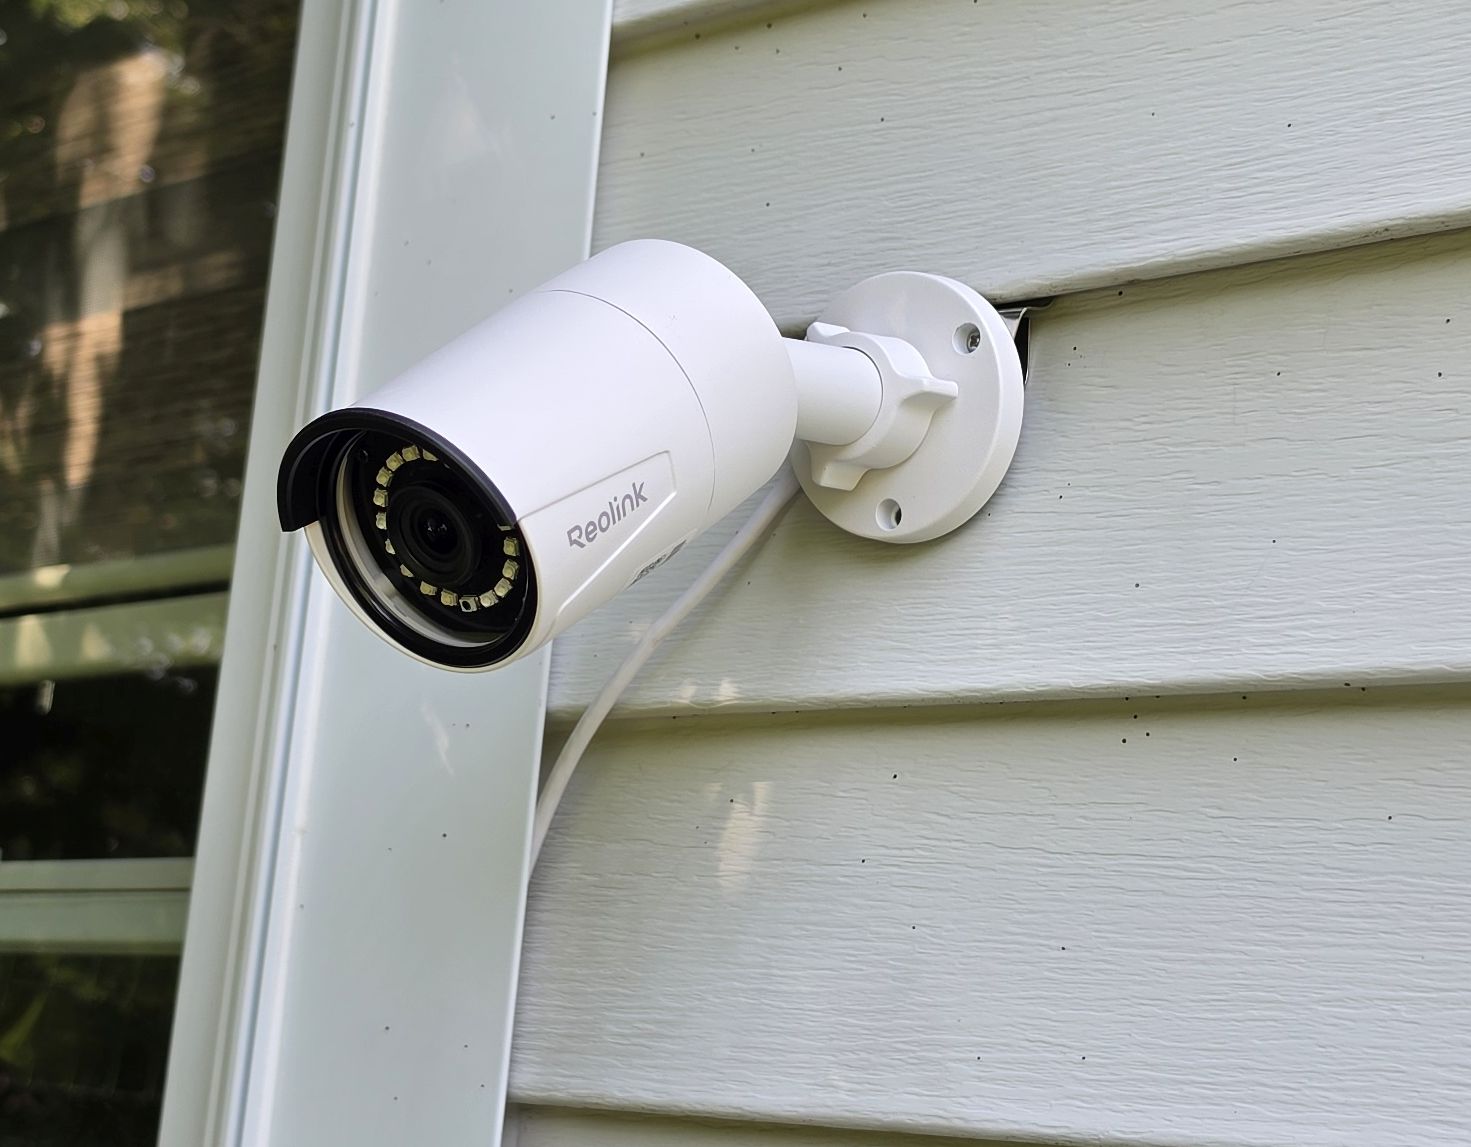
Reolink Bullet Cameras This Guide Covers
Reolink’s bullet cameras look nearly identical across generations because they use the same body shape and the same mounting screw positions on the base. The models most people are shopping mounts for right now:
- RLC-510A: 5MP PoE bullet with color night vision and person/vehicle detection
- RLC-1212A: 12MP PoE bullet with a built-in spotlight and siren
- RLC-810A: 4K PoE bullet, one of Reolink’s longest-running bullet models
- RP-PCB12M: Reolink’s newer Pro-Grade 12MP PoE bullet with a 100-degree field of view
The RLC-811A, RLC-510WA, and RLC-810WA use the same base pattern as well, so most of what follows applies to those too. The one thing to watch for is the larger dome-style models like the RLC-820A and RLC-1224A, which use a different bracket family entirely (the RLA-JBL1 and RLA-BKW4 accessories rather than the ones below).
| Mount | Best For | Compatible Models |
|---|---|---|
| Reolink Junction Box (RLA-JBS1) | Wall or ceiling mounting with hidden cable routing | RLC-510A, RLC-810A, RLC-1212A, RP-PCB12M, RLC-811A |
| Reolink Corner Mount Bracket (RLA-BKC1 V1.0) | Wide-angle coverage from a house or garage corner | RLC-510A, RLC-810A, RLC-1212A, RP-PCB12M and other compatible PoE bullets |
| NACETURE Vinyl Siding Hooks | No-drill mounting directly on vinyl siding | Any Reolink bullet camera using its included wall base |
| No-Drill Gutter Mount Bracket | Clamping to a gutter edge without drilling | Reolink bullet cameras with a standard mounting base |
Mount With the Official Reolink Junction Box (RLA-JBS1)
The RLA-JBS1 is Reolink’s own junction box for this camera family, and it is the setup we recommend for most wall and ceiling installs. Reolink previously sold this same box under the name “Junction Box B10,” and the two are interchangeable: the RLA-JBS1 is simply the current version, with a few extra mounting holes added so it fits a wider range of models, including the RLC-510A, RLC-810A, RLC-1212A, RLC-811A, and RP-PCB12M.
The box does two things a bare wall-mount screw cannot. First, it gives the camera’s PoE cable a sealed, weatherproof place to terminate, instead of a raw connector sitting exposed against the siding or soffit. Second, it hides the cable run behind the base plate rather than leaving it looped under the camera. Installation is a matter of routing the cable through the gland on the base, screwing the base to the wall using the included template, then threading the camera’s tail cable through the front plate and securing the camera to it.
Corner Mounting With the Reolink Bracket (RLA-BKC1)
A flat wall install gives you a roughly 100-degree field of view pointed straight out. Moving the camera onto a corner mount widens that considerably, since the camera can look down both sides of the house at once instead of just one. The RLA-BKC1 V1.0 is Reolink’s aluminum alloy corner bracket built for exactly this, and it works with the same bullet cameras covered here.
Installation follows the same logic as any corner bracket: you are mounting into two intersecting wall surfaces rather than one flat plane, so take a minute to confirm the corner can support the combined weight of the bracket and camera before drilling, and use the included wall anchors if you are going into siding over foam board rather than solid sheathing.
No-Drill Mounting on Vinyl Siding
If your house has vinyl siding and you would rather not put a screw hole in it, a siding hook is the simplest workaround. These hooks roll into the bottom lip of a siding panel and lock in place with no drilling and no adhesive. The flat tab on the hook then gives you a surface to attach the camera’s own wall-mount base or the junction box base to, so the camera itself never touches the siding directly.
The NACETURE hooks rated for this are stainless steel, rated to 12 pounds, and reversible if you ever move the camera or sell the house. A Reolink bullet camera with its junction box weighs well under that limit, so weight is not a concern. The main thing to check is your siding profile: these hooks are made for standard overlapping vinyl panels and will not seat properly on fiber cement, board-and-batten, or metal siding.
Gutter Mounting
For a downward-angled view over a driveway or side yard, clamping the camera to a gutter edge is worth considering, though it is the one option here we have not personally tested on a Reolink bullet camera. The clamp-style gutter brackets on the market are built around the same standard mount that most bullet shaped security cameras use on their base, which the Reolink bullet line has, so compatibility should not be an issue in principle. Confirm the listing states compatibility with a standard base, and check your gutter material and thickness against the bracket’s clamp range before ordering.
General Installation Steps
Regardless of which mount you land on, the actual process of getting a Reolink bullet camera onto a wall follows the same rough sequence:
- Plan the cable run first. PoE cameras need an Ethernet run back to a switch, NVR, or injector. Decide where that cable enters the wall or attic before you drill anything, since this often dictates where the mount can go more than the view itself does.
- Test the angle before committing to holes. Hold the camera or mount in place and check the live view on the Reolink app if the camera is already powered, or at minimum sight down the lens by eye. Bullet cameras have a fixed housing angle once mounted, so this is the point to catch a bad angle, not after the screws are in.
- Mount the base, then the camera. Whether that base is the junction box, the corner bracket, or a siding hook’s flat tab, get the base secured and weatherproofed first, then attach the camera body and thread the cable through last.
- Seal any exposed cable entry points. Even with a junction box, the point where the Ethernet cable exits the wall or soffit should be sealed against water intrusion with silicone caulk or a weatherproof grommet.
- Confirm the final field of view. Once mounted, pull up the live feed one more time and fine-tune the camera’s swivel adjustment on its base before you tighten everything down fully.
How to Choose the Right Mount
A few questions narrow this down quickly:
- Do you want cable protection or a bare wall mount? The RLA-JBS1 junction box is the better long-term choice any time the cable run is exposed to weather. A bare wall-mount screw works fine for short indoor runs or covered eaves where the cable is already protected.
- Do you need one wide angle or two directions? A flat wall mount covers one direction. A corner bracket covers two, which matters most on a garage corner or the front corner of a house facing a driveway.
- Can you drill into the surface? Vinyl siding hooks and gutter clamps both exist because plenty of homeowners, and renters especially, would rather not put permanent holes in siding or trim. If drilling is not an issue, a screwed-in bracket is generally the more secure long-term option.
- Is this a rental or HOA property? No-drill options are worth the small trade-off in rigidity if you need the install to be fully reversible.
FAQ
Do the RLC-510A, RLC-810A, and RLC-1212A all use the same mount?
Yes. All three, along with the RP-PCB12M and RLC-811A, share the same base mounting pattern, so any accessory built for one of these models will fit the others.
What is the difference between the RLA-JBS1 and the RLA-JBL1?
The RLA-JBS1 is sized for the compact bullet cameras covered in this guide. The RLA-JBL1 is the larger junction box built for Reolink’s dome-style cameras like the RLC-820A and RLC-1224A, which use a different base pattern entirely.
Is the “Junction Box B10” the same as the RLA-JBS1?
Yes. Reolink rebranded the B10 as the RLA-JBS1, adding a few extra mounting hole positions in the process. They are the same product line, and older product pages that reference the B10 are referring to what is now sold as the RLA-JBS1.
Can I mount a Reolink bullet camera on vinyl siding without drilling?
Yes, using a siding hook rated for the camera’s weight. The hook clips into the siding panel itself, and the camera’s mount attaches to the hook’s flat tab rather than to the siding.
Do I need the junction box, or can I just use the camera’s included wall mount?
The included wall mount works fine for a basic install. The junction box is worth the extra cost any time the cable connector would otherwise be exposed to rain, or when you want a cleaner finished look with no visible cable loop.