
The Reolink Duo 3 PoE is a large, dual-lens camera, and its stock mounting bracket only accounts for a handful of installation surfaces. If you are putting it on a corner post, on vinyl or wood siding, or over a junction box, the factory hardware needs help. Below are the Reolink Duo 3 mounts we recommend, including the one we use in our own install, plus a rundown of the other legitimate mounting approaches worth knowing about before you commit to a spot on the house.
Both mounts below keep the Duo 3’s factory bracket and mounting plate intact rather than trying to force the camera onto a generic 1/4″-20 arm, which is important because Reolink has never confirmed the Duo 3 PoE works with that kind of universal mounting pattern.
The other thing worth knowing before you buy anything is weight. The Duo 3 PoE is a large camera with two lenses and a built-in floodlight-adjacent body, and it is noticeably heavier than a typical single-lens outdoor camera. Any mounting stack you build, whether that is a pole clamp and faceplate or a soffit adapter, needs to be rated for that weight and secured into solid framing rather than siding alone.
| Mount | Best For | Installation Type |
|---|---|---|
| Corner Mount Bracket | Corner posts and building edges | Corner mount |
| Siding Mount Bracket | Vinyl and wood siding | Flat surface mount |
| RLA-JBS1 Junction Box | Installing over an existing electrical box | Junction box mount |
| Vertical Pole Mount | Poles, posts, and masts | Pole mount |
Corner Mount for the Reolink Duo 3 PoE
A corner installation gives the Duo 3’s dual lenses the widest possible field of view, which is a big part of why Reolink itself now recommends corner placement for wide-angle and multi-lens cameras. This bracket handles that angle without any drilling into the camera’s own housing, since the Duo 3’s factory mounting plate attaches to the bracket the same way it would attach to a flat wall.
If you are covering a driveway, a side yard, or the gap between two structures, this is the mount to reach for before anything else on this list.
Siding Mount for the Reolink Duo 3 PoE
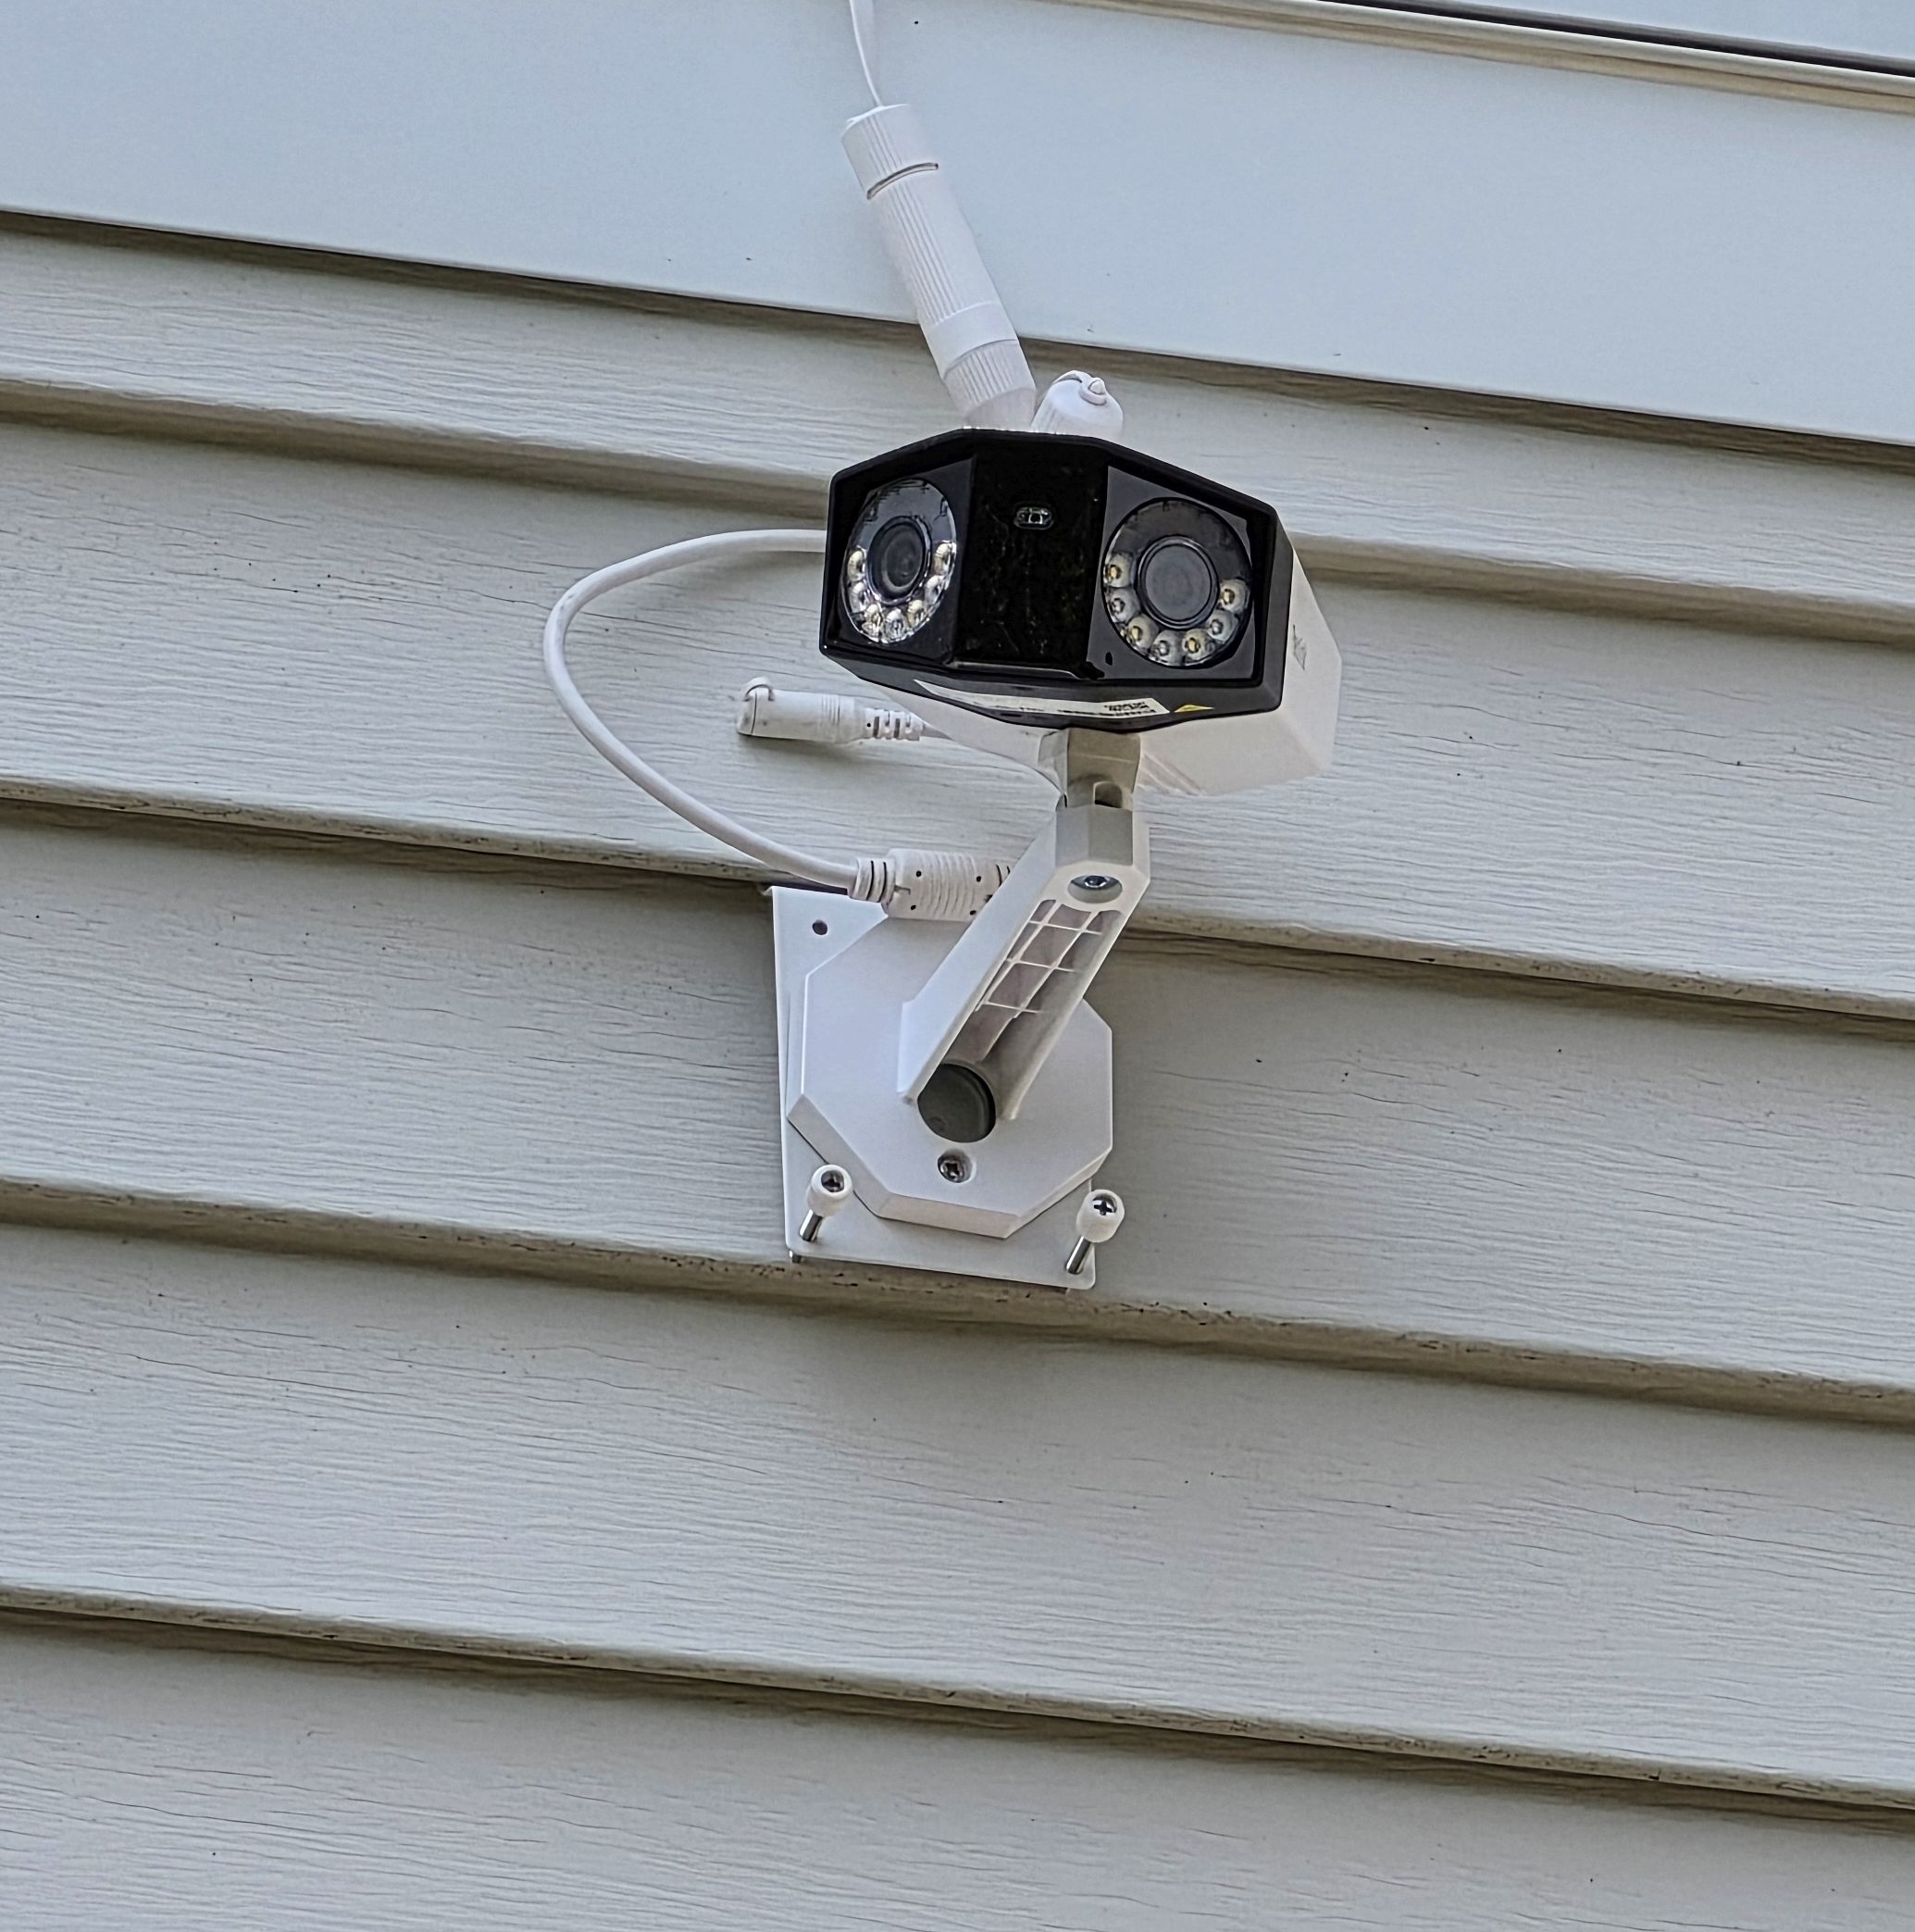
This is the mount we run on our own Duo 3 PoE, and it is the one shown in the photo above. It is built for a flat horizontal surface like lap siding, and it keeps the camera’s factory bracket doing the actual work of holding the camera, which means the mounting hole pattern issue that trips people up with generic mounts never comes into play here.
If your install spot is a flat stretch of siding rather than a corner, post, or soffit, this is the simpler of the two mounts to work with, and it is the one we would point most homeowners toward first.
The challenge with siding mounts is hidng the cables, which I still need to do a better job on.
Junction Box Mount for the Reolink Duo 3 PoE
If you are mounting the Duo 3 PoE over an existing electrical box, the RLA-JBS1 is Reolink’s own junction box, and it is listed as compatible with the Duo 3 PoE. The camera’s factory mounting plate attaches to the junction box’s front plate rather than to the wall directly, so the camera itself never touches the mounting surface.
The advantage here is cleaner cable management and better weather protection at the connection point, which matters more on the Duo 3 than on a single-lens camera since there is more cabling to manage behind the bracket. Reolink also sells a B10 junction box that works the same way if the RLA-JBS1 does not match your existing box footprint.
Installation follows the same basic sequence either way. The junction box mounts to the wall or post first, using its own screws and, ideally, a bead of exterior sealant around the base if you are working over an old electrical cutout. The Duo 3’s factory bracket then attaches to the junction box’s front plate exactly the way it would attach to a bare wall. The cable run stays hidden behind the box rather than looping outside where it is exposed to weather.
This is also the option worth considering if you are replacing an older camera that already has a junction box in place. Reusing the box instead of patching the wall and starting fresh saves both time and drilling.
Soffit Mounting
Soffit mounting is the trickiest spot for the Duo 3 because the stock bracket is not designed for a horizontal overhead surface. Owners who have solved this have generally gone one of two routes: a soffit-specific adapter built around the Duo’s 75mm octagonal mounting bracket, or a fabricated metal plate that converts the soffit surface into a vertical mounting point for the factory bracket. Either approach keeps the camera’s own hardware intact rather than replacing it.
One owner installing the Duo 3 PoE on a soffit ran into exactly this orientation problem and ended up fabricating a metal spacer to get the camera angled correctly. That kind of workaround is common enough with this camera that it is worth planning for rather than treating as a last resort if the first mount you try does not sit the way you expected.
Vertical Pole Mount for the Reolink Duo 3 PoE
For poles, posts, and masts, this vertical pole mount gives the Duo 3’s factory bracket a rigid, flat faceplate to attach to instead of trying to force the camera onto the round surface of the pole itself. It is the same mounting logic as a generic pole clamp and metal plate, just packaged as one part rather than two.
Measure the pole or post diameter before ordering, since most clamp-style mounts are sold in ranges rather than a single fixed size, and a clamp that is too loose will let the whole assembly rotate in wind. Stainless steel pole clamps, adjustable mast brackets, and fence-post brackets all follow the same basic principle if you need a different diameter range than this one covers.
We have not installed this specific mount ourselves. Based on the faceplate dimensions and the Duo 3’s bracket pattern, it should work as sold, but we cannot confirm the mounting holes line up without drilling. If they do not match exactly, drilling new holes in the faceplate is a simple fix and does not affect the mount’s function.
How to Choose the Right Reolink Duo 3 Mount
Start with the surface you are working with rather than the mount itself. A corner post or building edge points you toward the corner bracket. Flat siding points you toward the siding bracket. An existing electrical box on the wall makes the junction box option the cleanest choice, since it saves you from patching extra holes. A pole, post, or mast points you toward the vertical pole mount. Soffit is the one spot where you should expect to build a small mounting stack rather than buying a single part.
Field of view matters just as much as the surface. The Duo 3’s two lenses are angled to cover a wide horizontal spread, so a corner placement tends to get more usable coverage out of both lenses than a flat wall placement does. If you are choosing between two viable spots on the same structure, the one that lets both lenses see down a fence line or across a yard will generally beat the one that only gives you a straight-on view.
Cable routing is the last piece. PoE means a single Ethernet run is carrying both power and video, so plan the path from the camera back to your switch or injector before you commit to a mounting spot. A junction box installation makes this easier because the cable terminates inside the box rather than running exposed along the siding, while a pole or soffit install usually means running conduit or weatherproof cable clips separately.
For a deeper look at how we handle outdoor camera placement generally, see our guide to security camera mounting locations.
Frequently Asked Questions
Does the Reolink Duo 3 PoE work with generic camera mounts?
Not reliably. The Duo 3 uses its own mounting bracket and plate system, and Reolink has not confirmed compatibility with standard 1/4″-20 ball mounts. This is a heavy camera and most generic mounts are not made to hold this weight. Stick with mounts built around the factory bracket.
Can I mount the Duo 3 PoE on a corner?
Yes. Reolink specifically recommends corner placement for wide-angle and multi-lens cameras like the Duo 3, and a dedicated corner bracket handles the angle without modifying the camera’s housing.
What is the best mount for flat siding?
A siding-specific bracket that keeps the Duo 3’s factory mounting plate in place is the simplest option, and it is what we use on our own install.
Is there a mount for installing over a junction box?
Yes. The RLA-JBS1 is Reolink’s own junction box and is listed as compatible with the Duo 3 PoE, with the camera’s factory bracket attaching to its front plate.
Can the Duo 3 PoE be mounted on a pole or post?
Yes, using a mount that gives the camera’s factory bracket a flat, rigid faceplate rather than trying to attach the bracket to the round pole surface directly.