
The Tapo C575D is one of the more capable outdoor cameras in TP-Link’s lineup, pairing a 170-degree fixed wide lens with an 8mm pan and tilt telephoto lens in a single PoE-powered body. It ships with a basic wall and ceiling bracket, and for a simple flat wall install, that bracket does the job. But the C575D weighs over a pound and has real depth to it, and the moment you want it on vinyl siding without drilling, tucked under a gutter line, or wrapped around an outside corner for two-sided coverage, the included hardware runs out of options fast. This guide covers the best Tapo C575D mounts for those three situations, all of which work with the C575D’s dual-lens pan and tilt bracket footprint.
| Mount | Best For | Placement Type |
|---|---|---|
| HOLACA Vinyl Siding Mount | Homes with vinyl siding that want a drill-free install | Vinyl Siding |
| Koroao Gutter Mount | Higher placement without touching the siding or fascia | Gutter Lip |
| HOLACA Outside Corner Mount | Corner installs that need coverage of two sides at once | Outside Corner |
HOLACA Vinyl Siding Mount for the Tapo C575D
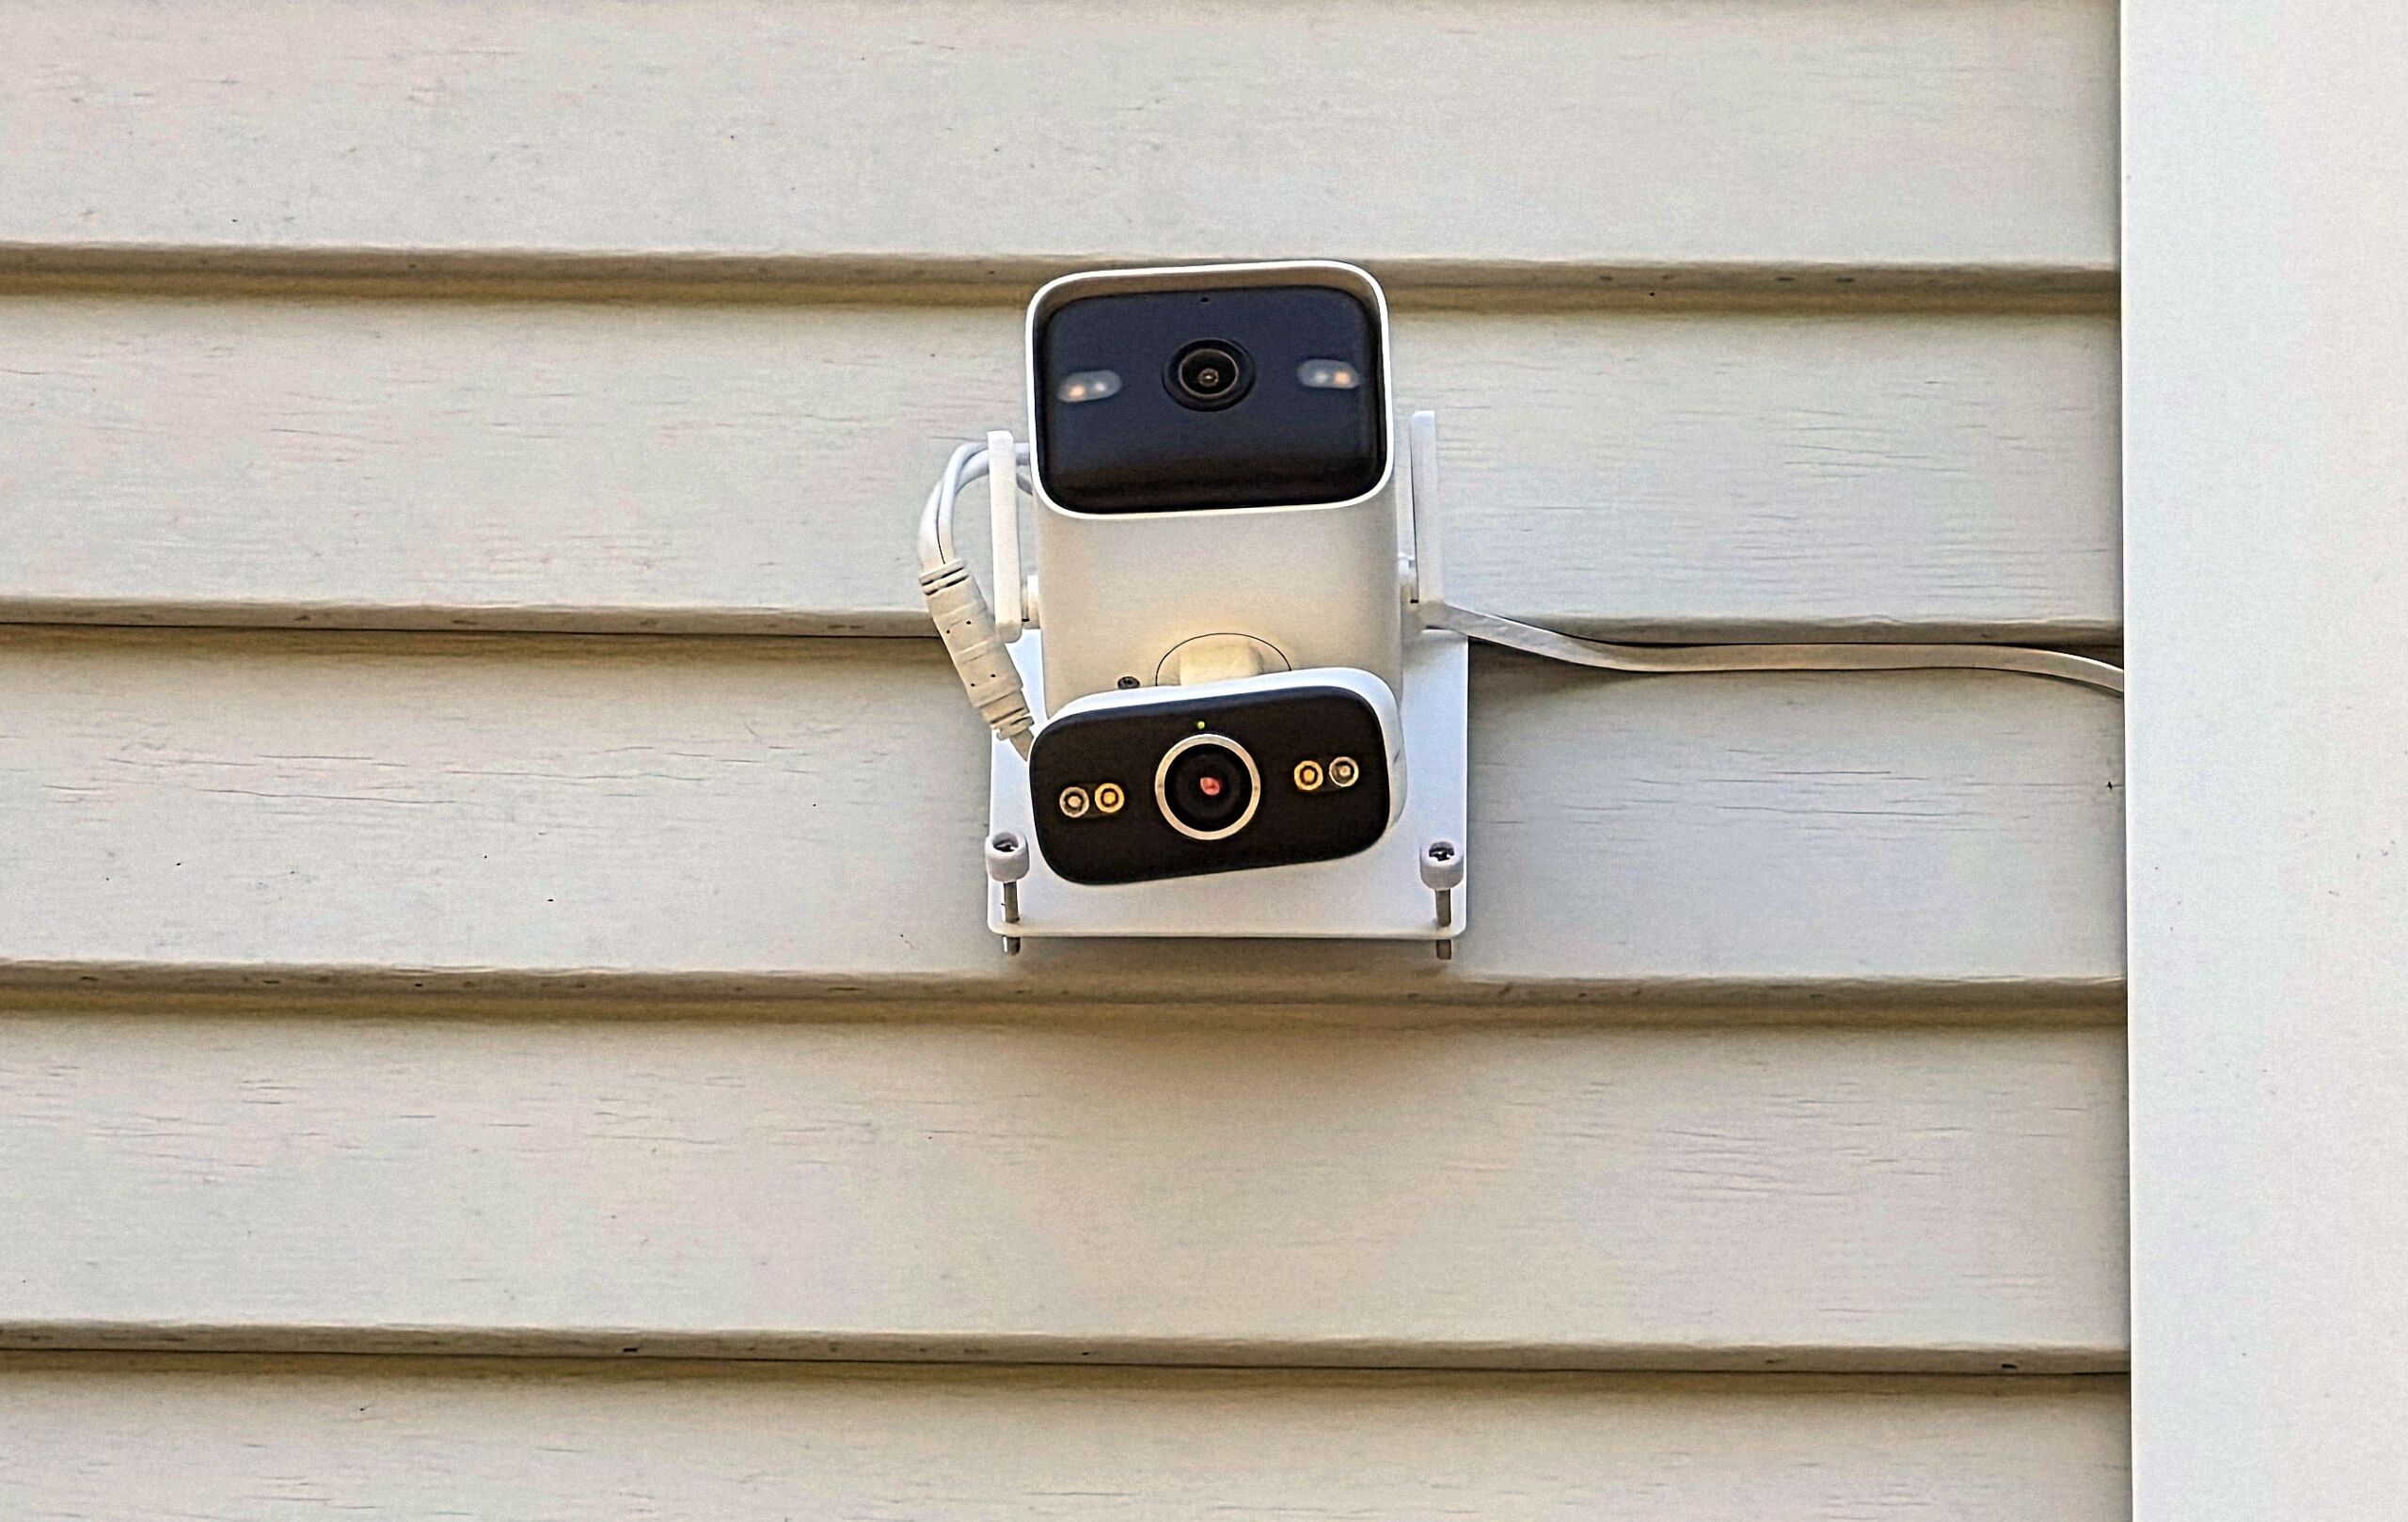
This is the mount deployed in the photo above.
Most homes built in the last few decades have vinyl siding somewhere on the exterior, and drilling into it to mount a camera is the kind of job that either cracks the panel or leaves a visible hole you have to explain later. The HOLACA siding mount clips onto the lap of a standard siding panel and holds the C575D’s bracket without a single screw going into the siding itself. Installation is a matter of hooking the mount under a panel edge and snugging it into place, then attaching the camera’s own bracket on top.
This is the mount to reach for when the ideal camera position happens to fall on a flat run of siding rather than a corner or under an eave. It keeps the install reversible too, which matters if you are renting or just not ready to commit to a permanent screw-mounted position yet.
Koroao Gutter Mount for the Tapo C575D
Gutter mounting puts the C575D higher up than a typical wall position, which is useful for covering a driveway, a front yard, or a wide side yard where a lower angle would get blocked by a fence or parked vehicle. The Koroao gutter mount clamps directly to the gutter lip with no drilling into the fascia or the gutter itself, and the arm adjusts so you can angle the camera down toward the area you actually want covered instead of straight out at the sky.
The tradeoff with gutter mounting is cable management. The C575D can run on PoE or its included DC adapter, and either way you are running a cable down from the gutter line to a power source or network switch. Plan that cable run before you commit to a spot, since fishing a cable back out from behind a gutter mount after the fact is more work than doing it right the first time.
HOLACA Outside Corner Mount for the Tapo C575D
Corners are one of the more underused camera positions on most homes, and they should not be. A camera mounted on an outside corner can cover two sides of a house at once, which is exactly the kind of coverage the C575D’s dual-lens setup is built for: the wide fixed lens takes in both sides broadly while the pan and tilt telephoto lens zooms in on whichever side has activity. The HOLACA corner mount wraps around a standard 90-degree exterior corner and gives the camera bracket a stable, angled base to sit on.
This is the mount worth considering if you only have budget or wiring access for one camera but need to watch a side yard and a driveway or backyard entry point at the same time. It will not replace two dedicated cameras pointed at two dedicated targets, but for a lot of residential layouts, one well-placed corner camera covers more ground than people expect.
Which Tapo C575D Mount Fits Your Setup
Picking between these three usually comes down to what your exterior actually gives you to work with, not personal preference. If the ideal camera position lands on a flat stretch of vinyl siding and you want to avoid putting holes in it, the siding mount is the obvious choice, and it is also the easiest of the three to remove or reposition later if your coverage needs change.
If you are trying to get height on the camera to look down over a driveway, yard, or entry path, and you already have gutters running along the roofline in the right spot, the gutter mount gets you that elevation without a ladder-and-drill job on the fascia board. And if your best sightline happens to be where two walls meet, the corner mount is worth considering before you settle for a flat wall position that only covers one direction.
It is also worth thinking about how far the mount puts the camera from your nearest power or network source. The siding and corner mounts tend to keep the camera closer to the house, which shortens the DC adapter or Ethernet run. The gutter mount, by design, moves the camera up and often slightly out from the wall, which can mean a longer cable path depending on your home’s layout. None of that rules a mount out, but it is worth planning before you install rather than after.
Why the Included Bracket Isn’t Always Enough
The bracket that ships with the C575D is a genuinely solid piece of hardware for a flat wall or ceiling install, and TP-Link includes a full set of screws, anchors, and a mounting template to make that job easy. Where it runs short is anywhere that is not a flat, drillable surface. Vinyl siding, gutters, and corners are three of the most common real-world spots homeowners actually want a camera, and none of them are what the stock bracket was designed around.
There is also the visibility factor to consider. A camera screwed directly to a flat wall is often lower and more exposed than one tucked along a gutter line or wrapped around a corner. For pure surveillance purposes that is not necessarily a problem, but if part of your goal is a camera that blends into the exterior rather than standing out as an obvious security fixture, these three placement styles tend to look more intentional and less like an afterthought bolted to the siding.
Installation Notes for PoE and DC Power
Because the C575D supports both PoE and a DC power adapter, your mounting choice can end up dictating your power choice as much as the other way around. A gutter or corner mount that sits farther from the house tends to favor a PoE run, since a single Ethernet cable carrying both power and data is easier to route cleanly along a gutter line or down a corner post than a separate power cable and a Wi-Fi-only setup. A siding mount closer to an existing outlet or junction box makes the DC adapter a simpler option.
If you are running PoE, confirm your switch or injector supports 802.3af or 802.3at before you buy anything, since the C575D needs one of those standards to power on over Ethernet. If you are going the DC adapter route instead, measure the actual distance from the mount position to the nearest outdoor-rated outlet before you commit to a spot. A gutter or corner position that looks perfect on paper is a lot less appealing once you realize it needs an extension cord run across a patio or through a flower bed.
FAQ
Does the Tapo C575D need a special mount, or will any 1/4-20 mount work?
The C575D uses its own dedicated bracket rather than the 1/4-20 threaded screw hole found on smaller bullet-style cameras, so it needs mounts built for that bracket footprint specifically, like the three covered above, rather than generic universal camera mounts.
Can I use the gutter mount and still run PoE to the camera?
Yes. The gutter mount does not interfere with the camera’s Ethernet port, but you will want to route the cable along the gutter and down a downspout or wall to keep it out of sight and protected from weather.
Will the corner mount work on a rounded or non-standard corner?
It is designed for a standard 90-degree exterior corner. Rounded corners, columns, or non-standard trim profiles may not seat the mount securely, so check your corner shape before ordering.
Do these mounts work with the Tapo C675D as well?
The C675D shares the same dual-lens pan and tilt bracket, but it also includes a solar panel that needs its own mounting consideration, so we cover that camera in a separate guide rather than folding it in here.
Does adding a third-party mount void the C575D’s warranty?
Third-party mounts attach to the camera’s existing bracket rather than the camera body itself, so they generally do not affect the camera’s warranty. If you have concerns about your specific situation, check TP-Link’s current warranty terms before installing.
Do I need any tools beyond what comes with the mount?
All three mounts include their own hardware for attaching to siding, a gutter lip, or a corner. You will typically need a screwdriver for attaching the C575D’s own bracket to the mount, but none of these require power tools or drilling into brick, stucco, or masonry.
Related Reading
For a broader look at aftermarket options across camera brands, see our guide to outdoor security camera mounts. If you are running a Tapo camera indoors as well, our Tapo C120 mounting guide covers magnetic and shelf-based options for that model.