
A Starlink Tesla mount is a little more complicated than putting a Starlink Mini under the glass roof and calling it a day. That setup can work very well in some Model Y, Model 3, Model S and Model X vehicles, but newer heat-reflective glass can weaken or completely block the satellite signal. Cybertruck adds another set of options, including roof racks, bed hardware and exterior mounting points. The best setup depends on your Tesla model, year and whether you want the Mini inside or outside the vehicle.
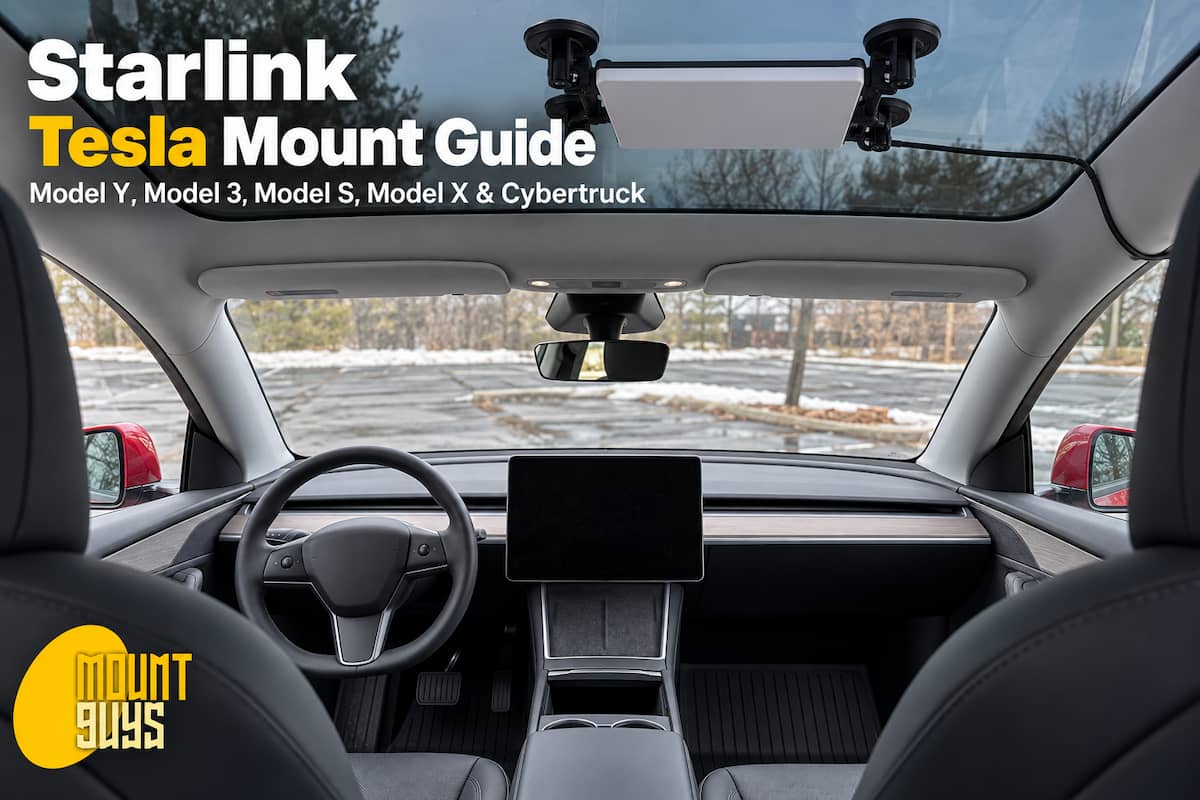
The most important advice in this guide is simple: test the Starlink Mini through the exact glass panel before buying an interior mount. Tesla has changed glass construction over the years, and two vehicles that look nearly identical from inside can behave very differently with a satellite antenna.
Best Starlink Tesla Mounts at a Glance
| Mount | Best For | Mount Type |
|---|---|---|
| Spigen Starlink Mini Car Mount | Compatible panoramic roof or rear glass | Four-point suction |
| FONKEN Starlink Mini Car Mount | Dashboard or windshield alternative | Adjustable suction mount |
| Vutnuny Starlink Mini Suction Mount | Simple removable interior installation | Low-profile suction |
| SOTOFY Starlink Mini Roof Rack Mount | Cybertruck with compatible rack or crossbars | Mechanical rack mount |
1. Spigen Starlink Mini Car Mount: Best Overall Interior Mount
The Spigen is my first choice when the Tesla’s glass passes the Starlink signal. It is designed specifically around the Starlink Mini instead of adapting a generic tablet or camera holder to a satellite antenna.
Four gel-pad suction cups spread the load across the glass, while the open frame keeps the face of the Mini clear. The antenna also releases from the frame without requiring you to dismantle the entire installation.
This is especially appealing in older Model Y vehicles where an under-roof installation has been proven to work. It can also make sense on other Teslas with suitable panoramic or rear glass, but do not buy it based solely on the shape of the roof. Test the Mini in the intended location first.
The other advantage of mounting inside is protection. The Mini stays out of the rain, away from branches and road debris, and does not have to fight highway airflow.
2. FONKEN Starlink Mini Mount: Best When the Roof Glass Does Not Work
The FONKEN becomes more interesting when mounting directly beneath the panoramic roof is not an option. Instead of holding the Mini flat against overhead glass, it uses an adjustable suction arrangement that can position the antenna against a windshield or another suitable glass surface.
This matters most with newer Model Y vehicles. Owner reports for the refreshed Model Y show the panoramic roof can interfere heavily with Starlink reception. Some owners have found other glass sections usable, while others have moved the Mini toward the front windshield.
A windshield-mounted Starlink Mini is much larger than a phone, so placement matters. It should never block the driver’s required field of view, interfere with cameras or sensors, or sit in an airbag deployment area. Windshield accessory laws also vary by state.
I see this as the test-and-position option. If the roof blocks the signal but another glass section works, the adjustable design gives you more freedom than a fixed roof frame.
3. Vutnuny Starlink Mini Suction Mount: Best Simple Removable Setup
The Vutnuny is the simpler alternative when you want a removable suction installation without the larger four-cup frame of the Spigen.
It is made for the Starlink Mini and attaches to smooth glass. That makes it useful for rear glass, a sunroof or another interior position that you have already tested for reception.
The key word there is tested. A mount can attach perfectly to a piece of Tesla glass while the glass itself prevents the Mini from maintaining a useful satellite connection.
This is also the style I would consider when the Mini moves between multiple vehicles. The smaller mounting assembly is easier to remove and store than a semi-permanent rack installation.
4. SOTOFY Starlink Mini Roof Rack Mount: Best Cybertruck Rack Option
Cybertruck is where I start leaning toward an exterior mechanical mount.
If your truck already has compatible crossbars, a bed rack or another suitable rail system, the SOTOFY gives the Mini a physical attachment point rather than relying on suction. That also gets the antenna completely outside the glass, eliminating the question of whether a particular roof panel is attenuating the satellite signal.
Do not assume every rack is compatible. Measure the mounting surface and compare it with the manufacturer’s specifications before ordering.
This style of installation is especially attractive for a Cybertruck used for camping, overlanding or remote work, where the Mini may stay installed for longer periods.
The Big Tesla Problem: Will Starlink Work Through the Glass?
This is the part that makes a Tesla-specific guide worthwhile.
An older Model Y and a newer Model Y can both have huge panoramic roofs, but that does not mean radio-frequency signals pass through them the same way. Modern automotive glass can include infrared-reflective or metallic layers designed to reduce heat entering the cabin. Those coatings can also interfere with satellite signals.
We have seen credible owner reports of the Starlink Mini working very well under the glass in earlier Model Y vehicles. We have also seen repeated reports from owners of the refreshed Model Y that the Mini cannot establish a reliable connection beneath the panoramic roof.
That means there is no responsible answer that says, “Starlink works through a Tesla roof.”
The answer is:
Our broader guide to using Starlink in a car covers glass, obstruction and interior mounting in more detail.
Starlink Mini in a Tesla Model Y
2020-2024 Model Y
Earlier Model Y vehicles are the strongest candidates for an under-roof installation. There are established owner setups using suction cups to hold the Mini beneath the panoramic glass while maintaining a usable connection.
If yours works during the temporary test, the Spigen is the cleanest solution in this guide. It keeps the Mini high, out of the driver’s sight line and protected inside the vehicle.
The rear hatch glass can also be tested, but watch for aftermarket tint film, defroster elements and the angle of the antenna.
2025+ Model Y
The refreshed Model Y is where I would stop assuming the roof is usable.
There are multiple owner reports of the newer heat-reflective roof glass preventing a Starlink Mini from connecting normally. Reports about the rear glass vary as well, which is another reason to test the exact car instead of relying on somebody else’s model year.
If the roof fails the test, the next locations I would investigate are the front windshield and a properly secured position behind or near the center display where the Mini can see through workable glass without blocking the driver.
The Behind-the-Screen Model Y Setup
One of the more interesting Model Y installations places the Starlink Mini behind the center screen rather than against the panoramic roof. This is not a one-piece retail mount. Owners are building it from a Mini holder, short extension arms and mounting points attached around the dash or vent area.
The advantage is important: it bypasses the signal-blocking panoramic roof.
It also keeps the Mini inside the car and avoids an exterior installation. The downside is complexity. You need to secure the antenna well enough that it cannot move during braking, confirm that it does not interfere with the touchscreen, and control reflections from the white face of the Mini against the windshield.
I would treat this as the advanced option for a newer Model Y, not the first installation to try.
Starlink Mini in a Tesla Model 3
For Model 3, use the same test-first approach.
If your roof glass passes the signal cleanly and there is enough clearance for the mounting frame, an interior suction setup keeps the Mini protected and requires no permanent modification.
If reception drops sharply beneath the roof, move the Mini to other glass temporarily before buying anything. Do not assume that because a mount is physically compatible with the Model 3 it will provide good Starlink performance through every model year of glass.
For accessories unrelated to Starlink, we also maintain a separate guide to Tesla Model 3 phone mounts.
Starlink Mini in a Model S or Model X
Model S and Model X owners have several large glass areas to test, particularly on vehicles with expansive windshields and rear glass.
I would still favor a high interior position where the Mini gets the widest possible view upward without entering the driver’s sight line.
Do not attach suction cups over damaged tint film or directly where a rear-window heating element creates an uneven mounting surface. A suction cup depends on a continuous seal, and a poor seal is a mounting problem even when reception is excellent.
Starlink Mini on a Cybertruck
Cybertruck deserves its own mounting strategy.
First, do not assume an interior roof mount will work. Owner results vary, including reports from newer trucks where roof glass reduces Starlink performance. An exterior installation removes that variable completely.
Cybertruck also gives you hardware options that a Model 3 or Model Y does not. Depending on vehicle configuration, the bed can include L-tracks and attachment points, and owners can add crossbars or racks that create a mechanically secure mounting location.
If the truck already has compatible crossbars, the SOTOFY above is a sensible monetized option. Starlink also sells its own Mini Roof Rack Mount for compatible rack bars.
There are also Cybertruck-specific mounts from specialty manufacturers that attach to vehicle hardware rather than depending on suction cups. For someone building a permanent Cybertruck setup, that is the direction I prefer.
If your Cybertruck does not already have a rack and you only need Starlink while parked, you can still test an interior suction setup first. Just do not assume that a setup working on somebody else’s production year means your roof glass will behave the same way.
For more exterior options, see our Starlink Mini truck mount guide.
How to Power Starlink Mini in a Tesla
The Starlink Mini is far easier to power in a vehicle than the larger Starlink hardware, but there is a lot of bad information online about what it requires.
Starlink’s published specifications rate the Mini for a 12-48V DC input at up to 60W, with typical power consumption around 25-40W. When using Starlink’s USB-C-to-barrel cable, the USB-C source needs to meet the required Power Delivery specification.
So the issue is not that every Tesla outlet is automatically too low-voltage. The issue is whether the specific outlet, adapter and cable combination can provide enough clean power at the voltage and current the Mini requires.
Tesla low-voltage systems have also changed over the years. Some later Model 3 and Model Y vehicles use a higher-voltage low-voltage architecture than older 12V cars. That is why I prefer a vehicle adapter with a published input range that covers the Tesla you own rather than grabbing a generic cigarette-lighter cable.
Our Starlink Mini car adapter guide covers the plug-in power options separately.
Model Y and Model 3 Accessory Power
Current Tesla manuals list low-voltage accessory outlets capable of substantial continuous accessory draw, and newer software includes controls for keeping accessory power available while the vehicle is parked.
That makes the trunk outlet particularly convenient in a Model Y because the Mini is often mounted toward the rear half of the cabin. A properly rated adapter can stay out of the front console and keep most of the cable routing behind the seats.
Cybertruck Power
Cybertruck gives you more choices.
Depending on configuration, it can provide 120V AC outlets in the cabin and cargo bed. Tesla also provides dedicated 48V accessory power feeds, including a roof feed, but tapping those feeds is not a casual DIY job. Tesla specifically warns that direct accessory connections should use the designated feeds and should be performed by someone who understands the system.
For most owners, using an existing outlet with properly rated Starlink power hardware is the simpler choice. A direct 48V installation makes more sense when the Mini is becoming a permanent part of the truck.
Cable Routing Without Drilling the Tesla
An interior mount makes cable routing much easier because everything remains inside the cabin.
Run the power cable along existing trim wherever possible and keep it away from seat tracks, pedals, moving seat mechanisms and airbag deployment areas. Do not wedge the cable into a trim gap that crushes it when a seat or door moves.
An exterior Cybertruck installation is different. If the Mini is mounted to a rack or bed hardware, route the cable along the rack or another protected path and secure it at regular intervals so it cannot flap against the body at highway speed.
For a temporary exterior setup on any Tesla, I would rather route a cable carefully through an existing weather-sealed opening than slam a door repeatedly onto the same section of cable.
Heat Under the Tesla Glass Roof
Heat is another reason not to treat an interior roof installation as maintenance-free.
Starlink rates the Mini for operation up to 122°F. The cabin directly beneath a panoramic roof can become extremely hot in direct sun, particularly when the vehicle is parked.
The Mini itself also produces heat while operating.
If you are using the dish for several hours while parked in hot weather, monitor the temperature and connection rather than leaving it running indefinitely in a sealed car. Climate control or Camp Mode can reduce cabin temperature, but both consume vehicle energy.
Suction cups also deserve periodic inspection. Heat cycles, dust and repeated removal can weaken the seal even when the cup still looks normal.
Can Starlink Mini Work While Driving a Tesla?
Yes, Starlink supports in-motion service with eligible hardware and service plans in authorized locations.
That does not mean every Starlink kit, service plan and homemade mount is automatically approved for in-motion use.
Starlink’s terms require equipment used on a moving vehicle to be an eligible kit and to be properly secured. Current service rules also depend on the plan and region.
From a mounting standpoint, there is a big difference between an interior suction mount protected from airflow and a generic suction cup stuck to the outside of a car at highway speed.
For regular in-motion use, my preference would be:
- A secure interior mount when the glass passes the signal
- A mechanically attached roof-rack or vehicle-specific exterior mount
- A properly installed permanent mobility mount
I would not trust an exterior generic suction mount simply because it survives a pull test in the driveway.
Which Starlink Tesla Mount Should You Buy?
For an older Model Y with proven roof-glass reception, the Spigen is the cleanest all-around choice.
For a newer Model Y where the roof blocks the signal, test the front windshield and other usable glass before buying. The FONKEN gives you more positioning flexibility, while a custom behind-the-screen installation is worth considering if you want something more permanent.
For Model 3, Model S and Model X, test the glass first and then choose between the Spigen and a smaller removable suction mount such as the Vutnuny.
For Cybertruck, I would favor an exterior mechanical solution. If compatible rack hardware is already installed, the SOTOFY is the most natural choice from the products above.
The mistake is choosing the mount first.
Test the signal first. Then buy the mount that fits the location that works.
Frequently Asked Questions
Will Starlink Mini work through a Tesla glass roof?
Sometimes. Earlier Model Y vehicles have documented successful interior installations, while newer heat-reflective roof glass can significantly reduce or block Starlink reception. Test the Mini under your exact roof before purchasing a suction mount.
What is the best Starlink mount for a Tesla Model Y?
If the roof glass passes the signal, the Spigen Starlink Mini Car Mount is my first choice because it uses four suction points and keeps the antenna close to the glass. On newer Model Y vehicles where the roof interferes with reception, another glass position or a behind-the-screen setup may work better.
Can I mount Starlink Mini behind the Tesla screen?
Yes, custom installations have been built behind or above the center display, particularly in newer Model Y vehicles where the roof glass causes reception problems. This is more involved than a suction mount and requires a secure bracket system that does not interfere with the screen, driver visibility or airbags.
Can I use Starlink Mini in a Cybertruck?
Yes. Interior and exterior installations are possible. For frequent use, Cybertruck is particularly well suited to rack, crossbar or vehicle-specific exterior mounting because it offers more attachment and power options than the other Tesla models.
Will a magnetic Starlink mount work on a Tesla?
Do not choose a magnetic mount simply because part of the vehicle contains steel. The panoramic roof itself is glass, and Tesla body construction varies by model and location. Choose the attachment point first, then select a mounting method that is compatible with that exact surface.
Can Starlink Mini run from Tesla accessory power?
Yes, provided the outlet, cable and adapter combination meets the Mini’s power requirements. Starlink rates the Mini for 12-48V DC input at up to 60W. Check the specifications of the adapter rather than assuming any USB-C or accessory plug will provide sufficient power.
Can Starlink Mini stay connected while the Tesla is moving?
Starlink offers in-motion service with eligible equipment and plans in authorized regions. The physical installation still needs to be suitable for vehicle movement, and Starlink’s current service terms should be checked before relying on an in-motion setup.
Related Mount Guides
Complete Starlink Mount Guide
Starlink in a Car: Does It Work While Driving?
Best Starlink Mini Truck Mounts
Best Starlink Mini Car Adapters