
The best GoPro mounts for skiing depend on what you want in the picture and what your gear allows. A chest harness includes your hands, poles, and ski tips for a sense of speed and body movement. A helmet mount follows your head across the terrain, while a handheld setup lets you move the camera away from your body for third-person or follow angles. The most useful choice is not the accessory bundle with the most plastic parts. It is the mount that fits over your winter layers, stays intact in freezing temperatures, and gets the shot without interfering with your skiing.
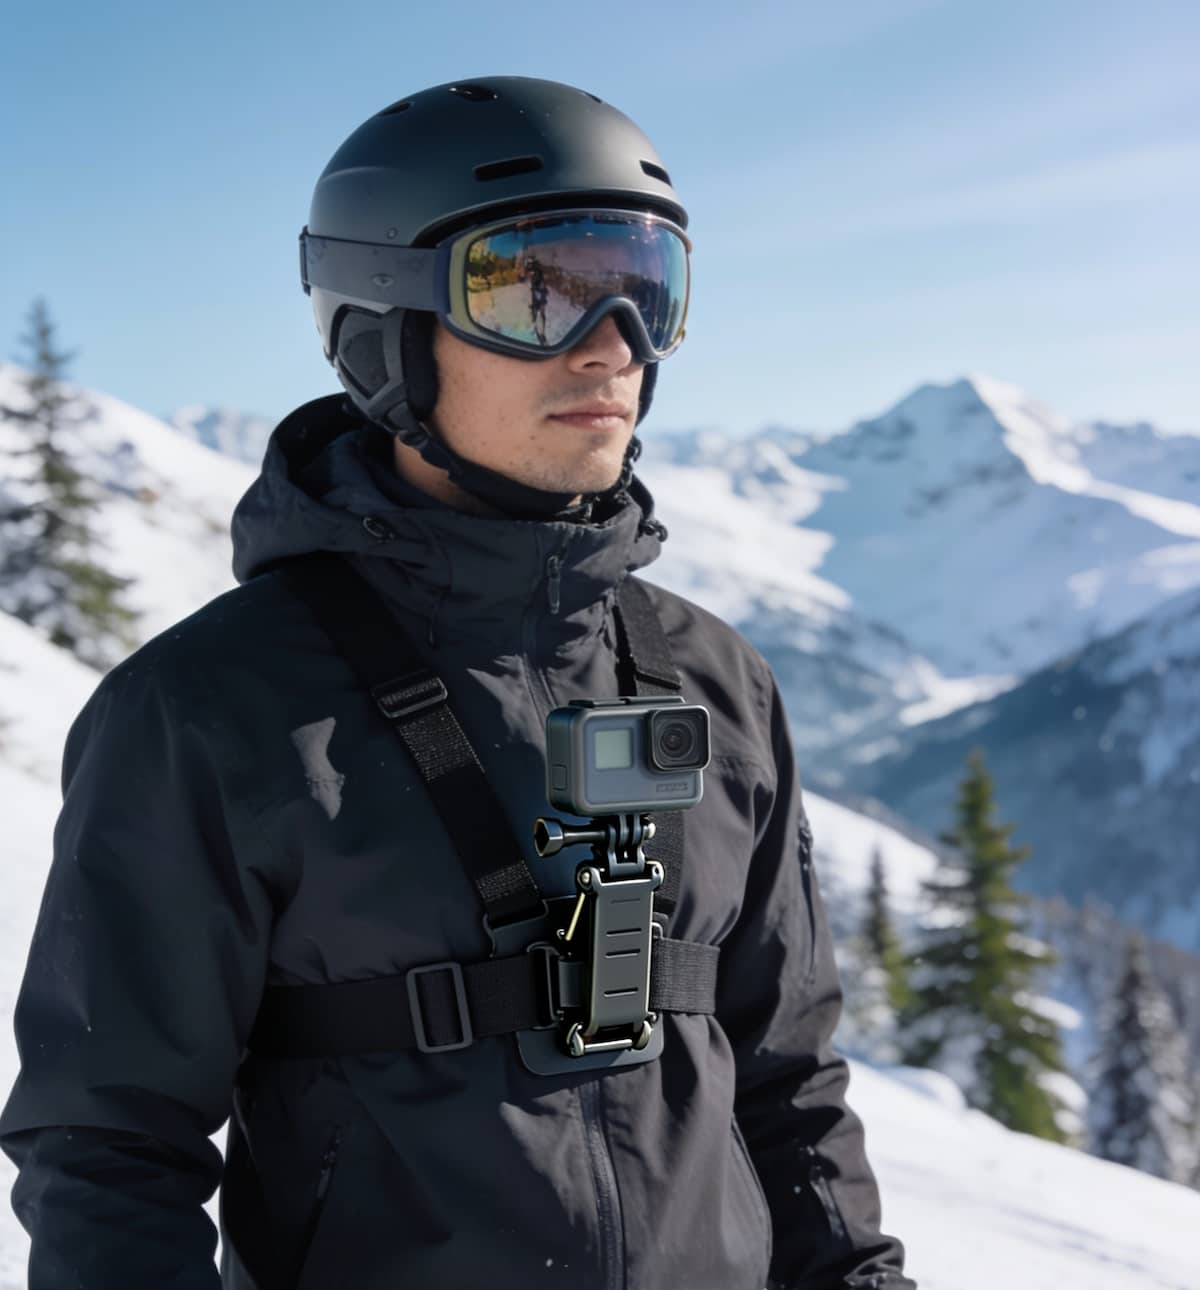
Quick Answer: Start with the GoPro Chesty for hands-free, forward-facing skiing footage, or the Dango Design Gripper Mount when you want a removable clamp for a full-face chin bar or pack strap. Add GoPro The Handler as an optional pocket-friendly grip for quick-release camera swaps and high-visibility recovery if dropped in snow.
This guide concentrates on mounting hardware, cold-weather fitment, and camera position on snow. For other sports and hardware setups, our GoPro mounts guide and main camera mounts hub connect you with motorcycle, bicycle, kayak, and other activity-specific mounting guides.
Best GoPro Mounts for Skiing: Quick Comparison
| Mount | Best Use | Main Fit Check | Main Tradeoff |
|---|---|---|---|
| GoPro Chesty | Hands-free, forward-facing skiing footage | Harness adjustment over outer ski jacket and inverted tilt angle | Camera angle drops toward snow when you lean forward |
| Dango Design Gripper Mount | Removable clamp for full-face chin bars, suitable helmet brims, or pack straps | Clamping edge thickness, goggle clearance, and helmet suitability | Needs a clampable chin bar or rim; not for smooth, edgeless half-shell domes |
| GoPro The Handler | Handheld clips, quick-release swaps, and high-visibility recovery in snow | Grip access with winter gloves and pocket or pack space to stow it | Occupies a hand; fixed-length grip without a built-in extension arm |
Camera compatibility and orientation: GoPro cameras connect through the standard two-prong and three-prong mounting finger system. Check whether your camera connects through built-in folding fingers (HERO8 Black and newer) or requires its model-specific frame or housing. If you want vertical 9:16 clips for social media without adding a 90-degree vertical bracket, shoot in a full-sensor 8:7 aspect ratio on newer GoPro models so you can crop horizontal or vertical video later without changing your physical mount hardware.
Helmet, Chest, or Handheld: Choose the View First
A chest-mounted camera points where your torso points. That suits a skier looking for a steady forward view with hands, poles, and ski tips visible in the lower frame. Because your torso remains relatively stable down the fall line, you can turn your head to check uphill traffic or blind spots without swinging the camera across the slope.
A helmet-mounted camera follows your head instead. That works well when looking toward sidecountry scenery, tracking another skier through trees, or keeping the camera high above deep powder spray. However, every quick safety glance to the side becomes part of the recording. Neither position guarantees better video; they tell different versions of the same run.
A handheld grip moves the camera off your body for quick follow clips or selfies, but it occupies one hand. It earns its place when you deliberately choose the angle on open runs rather than when you are aggressively planting poles through tight moguls. For a first setup, get one hands-free position working reliably before adding handheld equipment.
GoPro Chesty: Starting Pick for Hands-Free Skiing
The GoPro Chesty (model AGCHM-001) makes sense when you want to record a run without clamping or sticking hardware to your helmet or holding another piece of equipment. GoPro specifies a padded, flexible, adjustable harness that fits over heavy winter jackets, paired with a quick-release chest buckle you can press with ski gloves on. The kit includes the chest harness, vertical mounting buckle, and thumb screw.
Fitment over winter gear requires different adjustments than wearing the harness over a summer T-shirt. Fit the harness over the exact outer jacket and mid-layers you will wear on the mountain, not over a base layer at home. Adjust the elastic straps so the chest plate stays centered when you move your shoulders, bend at the waist, and bring your arms forward in a pole-planting motion. It should stay snug without restricting your breathing or blocking chest pockets you need on the lift.
Use Inverted Mounting to Fix the Ski Stance Angle
Camera tilt needs its own check before you head to the chairlift. Standing upright in the lodge is not the same as leaning forward into your ski boots on a steep pitch. A camera that looks level while you stand straight will often point down at your knees and snow once you flex your ankles and hips.
If standard upright mounting cannot tilt back far enough against the chest plate, mount the GoPro upside-down in the J-hook buckle. Inverting the camera gives the housing clearance to hinge much farther upward toward the horizon while you are in an athletic skiing stance. Modern GoPro cameras detect inverted orientation and flip the recorded video right-side up automatically, provided auto-rotation is enabled in your preferences.
Also check your complete upper-body outfit before starting a run. A tall fleece collar, loose helmet chin strap, zipper pull, or dangling pass lanyard can blow upward into the lens at speed. If you shed a mid-layer in the afternoon, tighten the harness straps again rather than assuming your morning adjustment still holds the plate flat.
Choose it for: A stable, forward-facing view with both hands free for your ski poles. Choose something else when: You specifically want the camera to follow where you look rather than where your chest faces.
Dango Design Gripper Mount: Removable Clamp for Chin Bars, Brims, and Straps
Many skiers want head-level POV footage or a quick multi-location mount without permanently bonding 3M VHB adhesive pads to an expensive helmet shell. The Dango Design Gripper Mount solves that problem with a heavy-duty, dual-torsion spring clamp and a flexible front web that conforms to irregular edges. It includes a two-axis rotating GoPro finger mount so you can level the horizon whether the clamp is attached vertically or horizontally.
Before clamping onto any helmet, verify your helmet style and manufacturer guidance. Never drill a helmet shell, cut the impact liner, or clamp over movable safety and ventilation mechanisms.
Full-Face Chin Bars vs. Open-Face Ski Helmets
Where the Dango Design Gripper Mount excels is on full-face helmets (such as snowcross, backcountry skiing full-face lids, or downhill helmets with a rigid chin bar). The spring-loaded jaws clamp directly over the chin bar, placing the GoPro in a centered, low-drag POV position without waiting 24 hours for glue to cure.
On a traditional open-face resort ski helmet without a chin bar, a spring clamp cannot grip the middle of a smooth, rounded polycarbonate dome. It requires a sturdy, exposed helmet visor brim or lip where the jaws can bite securely without slipping, blocking your goggle frame, or pressing into the EPS foam liner. If your open-face ski helmet has a flush, edgeless front profile, use the Gripper Mount on a thick backpack shoulder strap, pole section, or stationary rail, or use a traditional curved adhesive base on helmets that permit adhesive installation.
Side Positioning and Goggle Strap Alternatives
When clamping to a helmet brim or pack strap, check that the jaw footprint does not interfere with your goggle strap or field of vision. Preview the camera framing with your goggles resting both over your eyes and pushed up on your forehead. Keep the camera body tucked close to the swivel base rather than stacking long extension arms that increase torque on the clamp in rough snow.
Skiers using edgeless rental helmets sometimes look at elastic goggle-strap mounts, but the weight of a modern GoPro on a stretchy goggle band introduces bounce on choppy snow and can pull goggle foam away from your face. Our broader GoPro helmet mount guide compares clamp, strap, and adhesive helmet attachment styles in detail.
Choose it for: Instant, non-adhesive clamping on full-face helmet chin bars, compatible helmet visor lips, or heavy pack straps. Main limitation: Needs a physical edge, chin bar, or rim to grip; cannot clamp onto a smooth, rimless open-face helmet dome.
GoPro The Handler: Compact Handheld Grip for Quick Swaps and Snow Recovery
When you want a simple, lightweight hand grip that stows easily inside a ski jacket pocket, GoPro The Handler (model AFHGM-003) is a practical alternative to bulky multi-joint folding arms. Although originally designed as a floating hand grip for water sports, three hardware features make it unexpectedly useful on a ski trip:
- Integrated quick-release base: Instead of unthreading a frozen thumb screw with cold fingers, The Handler has a built-in GoPro quick-release receiver at the top. You can unclip your GoPro from your Chesty harness or helmet buckle and slide it straight onto the hand grip in seconds.
- High-visibility orange end cap: Dropping a black camera mount into deep powder usually means losing it until spring. The Handler’s bright orange base cap makes it much easier to spot if dropped in snow.
- Non-slip glove grip and wrist lanyard: The textured hydrophobic handle gives winter gloves a secure hold, and the included wrist strap lanyard helps prevent drops over a chairlift or ridge.
Treat The Handler as a secondary accessory rather than your primary skiing mount. Because it is a fixed-length grip without an extendable boom or fold-out tripod legs, it is meant for close-up handheld follow clips, summit commentary, and quick off-body panning. Because it occupies one hand, never use a camera grip to support your weight or replace a ski pole on steep terrain, and stow it inside a zippered pocket before loading or unloading a lift.
Choose it for: Fast quick-release swaps from a chest or helmet mount, easy pocket storage, and high visibility in snow. Main limitation: Fixed-length grip; does not extend like a selfie stick or fold out into a standalone tripod.
What About a Backpack Strap Mount and Avalanche Transceivers?
A shoulder-strap clamp (including clamping the Dango Design Gripper Mount onto a thick pack strap) is worth considering if you always ski with a hydration or backcountry pack. Still, it requires careful testing before you choose it over a dedicated chest harness. Unlike a tensioned chest plate centered on your sternum, a single backpack strap often twists outward or sags when the pack weight shifts during turns.
Fit the mount to your fully loaded pack while wearing your winter shell. Check whether the strap rolls toward your arm, whether the lens clears your chin and collar, and whether your shoulder blocks half the frame when you reach forward to plant a pole. A strap mount that looks straight while standing still in a room can point straight into your biceps once you start skiing.
Avalanche Beacon Electronic Interference Rules
For backcountry, sidecountry, or in-bounds avalanche terrain where you wear an avalanche transceiver (beacon), camera placement is a critical safety decision. Action cameras, lithium-ion batteries, magnetic quick-release mounts, and wireless Wi-Fi or Bluetooth signals create electromagnetic interference that can distort a transceiver’s signal or create false distance readings during a rescue search.
Follow your transceiver manufacturer’s strict separation distances before wearing a GoPro Chesty or shoulder-strap mount over a beacon harness. Mammut’s Barryvox reference guide and standard avalanche safety guidelines call for keeping electronic devices at least 20 cm (8 inches) away from a transceiver in SEND (transmit) mode, and at least 50 cm (20 inches) away during SEARCH mode. Never place a chest-mounted camera directly over a transceiver pouch, and turn off all cameras completely if an avalanche search begins.
Installation and Sub-Freezing Hardware Precautions
Install Adhesive Mounts at Room Temperature Before the Trip
If your helmet comes with or uses a curved 3M VHB adhesive base, never apply it for the first time in a freezing resort parking lot. GoPro’s adhesive mounting instructions specify applying the pressure-sensitive pad to a clean, dry, smooth surface at room temperature and allowing at least 24 hours for the bond to cure before use. Cold shell plastic prevents the adhesive from flowing into microscopic surface pores, which can cause the base to pop off on the first cold bump.
Dry-fit any adhesive base against the helmet before peeling the backing liner. If the base bridges across a vent slot, rocks over a molded ridge, or touches only along two edges, it will fail. Pick a smooth, matching curve or use a chest harness or mechanical clamp instead of stacking foam tape to fill a gap.
Important: GoPro explicitly warns against using a camera tether when mounting a GoPro on a helmet, as a tethered camera can recoil or snag during a crash. GoPro also warns against mounting a camera directly onto skis or snowboards, where flex, edge vibration, and snow load strip adhesives. These warnings appear in GoPro’s official camera safety and handling documentation.
Watch for Cold-Weather Plastic Brittleness and Ice Buildup
Standard polycarbonate quick-release buckles and mounting prongs lose flexibility in sub-freezing temperatures. When you squeeze the two pinch prongs of a quick-release buckle in single-digit weather, trapped ice or frozen snow inside the baseplate slots can stop the prongs from compressing evenly and cause a plastic leg to snap.
Assemble and slide your quick-release buckles together indoors before heading out into the cold. If you swap your camera between the Chesty and The Handler on the mountain, blow any packed snow or ice crystals out of the receiver tracks before sliding the buckle home, and listen for the positive click of both locking tabs. Tighten thumb screws firmly by hand rather than cranking them with metal wrenches in freezing air, which can crack cold plastic mounting ears. Keep the flexible rubber locking plug seated between the buckle prongs so vibrations do not back the clip out.
Cold-Weather Battery Care and the First-Run Check
Even the sturdiest mount is useless if a frozen battery shuts the camera down two turns off the summit. Standard lithium-ion batteries suffer steep voltage drops in freezing air. GoPro recommends using model-matched Enduro cold-weather batteries and keeping spares warm inside an interior jacket pocket until right before you record. Match the Enduro battery to your exact camera generation rather than assuming all GoPro batteries share the same housing. See GoPro’s cold-weather battery guidance for operating temperature details.
Carry spare batteries in plastic protective sleeves away from loose keys or coins. When swapping a battery, step inside a lodge or sheltered gondola cabin and wipe melted snow away from the side door seal so moisture does not get trapped inside the battery bay. Keep the side door latched tight on snow rather than skiing with an open pass-through cable that exposes internal contacts to powder spray.
Record a 15-second test clip at the top of your first run and play it back on your screen or phone app. Check the horizon level and the ratio of sky to snow while flexing into your normal skiing stance. If you use Horizon Leveling or Horizon Lock to keep the picture flat through steep carves, confirm that your digital lens setting is not cropping out your ski tips. Recheck all joints after any fall, and wipe snow droplets off the lens cover before dropping in.
Frequently Asked Questions
Should a GoPro Chest Mount Go Over or Under a Ski Jacket?
Wear the GoPro Chesty over your outer ski jacket so the lens remains completely unobstructed and you can reach the camera buttons and quick-release buckle with gloves on. Fit the straps over your full winter layers, mount the camera upside-down in its J-hook buckle if you need extra upward tilt to offset your forward ski stance, and tighten the harness if you remove a mid-layer later in the day.
Do These Mounts Also Work for Snowboarding?
Helmet mounts and handheld grips transfer directly to snowboarding, but chest mounts behave very differently. Because a skier’s chest faces straight downhill while a snowboarder rides sideways, a centered chest harness points off to the side of the trail rather than down the fall line. GoPro highlights this stance difference in its skiing and snowboarding camera guide. Snowboarders generally get better framing from a helmet mount or a handheld grip.
How Many Mounts Do I Need for a Ski Trip?
Start with one reliable hands-free mount, such as the GoPro Chesty (or the Dango Design Gripper Mount if you wear a compatible full-face or brimmed helmet). Ski a few runs and review the footage before buying extra accessories. Once your primary POV angle is dialed in, add GoPro The Handler for quick pocket-sized handheld clips or off-body follow shots.
Which GoPro Skiing Mount Would I Choose?
For a first skiing setup, start with the GoPro Chesty, mount the camera inverted in the buckle so you can tilt it slightly upward, and spend five minutes adjusting the harness over your ski jacket. It keeps both hands completely free for your poles and avoids sticking semi-permanent adhesive pads to your helmet shell.
Choose the Dango Design Gripper Mount when you want a rugged, non-adhesive spring clamp for a full-face helmet chin bar, a compatible visor brim, or a heavy pack strap. Add GoPro The Handler when you want a compact, high-visibility quick-release hand grip that slips easily into a jacket pocket.
If you want mounting hardware that transitions straight to warm-weather riding once the snow melts, our GoPro bike mounts guide covers how chest, helmet, and handlebar clamps perform on two wheels. If you also film powersports, see our motorcycle mounts hub for vibration-isolated and helmet-mounted setups.