One of the most overlooked problems with a HAM or CB radio install is simple: where does the mic go when you’re not using it?
A lot of people just toss it on the passenger seat. That works—until you have a passenger. Then suddenly your mic is sliding around, falling on the floor, or getting in the way. Mounting it to the side of the radio isn’t much better, especially when the radio is tucked under the dash where it’s hard to reach safely while driving.
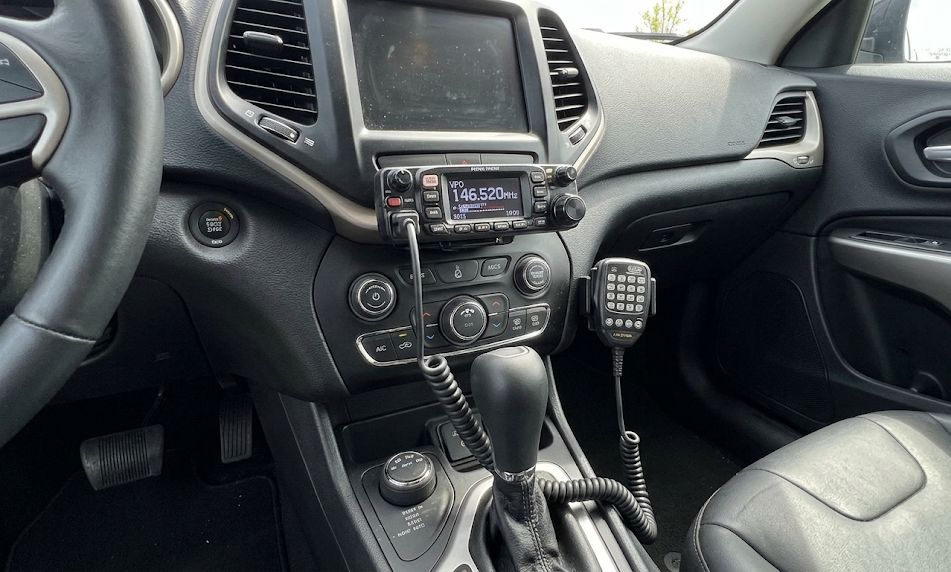
This is where a proper mic holder or mount makes a huge difference. A good setup keeps the mic within reach, easy to grab, and just as easy to put back—without taking your eyes off the road.
Best Mic Holder Types at a Glance
| Mount Type | Best For | Installation | Verdict |
|---|---|---|---|
| Screw-In Mount | Permanent installs | Requires drilling | Most secure |
| Adhesive Mount | No-drill installs | Very easy | Best clean option |
| Magnetic Mount | Ease of use | Moderate | Easiest to grab/use |
| AMPS-Compatible | Custom installs | Varies | Most flexible |
How Mic Holders Actually Work
Most HAM and CB radio microphones use a small round mounting button on the back. That button slides into a groove or slot on the holder, locking it in place.
This design has been around for decades and is surprisingly consistent across brands. Whether you’re using Yaesu, Icom, Kenwood, or a CB radio, chances are your mic will work with most standard holders.
1. Screw-In Mic Holders (Most Secure)
This is the traditional solution and still the most reliable. These mounts attach with screws directly to your dash, console, or mounting bracket.
If you want something that will never move, this is it. Once installed properly, it becomes part of the vehicle. So while these are very secure, it also is very difficult to remove without leaving holes in the dash. If your vehicle is leased, avoid this option and go with an adhesive method.
2. Adhesive Mic Holders (Best No-Drill Option)
If you don’t want to drill into your dash, adhesive mounts are the best alternative. These use strong backing tape to attach to flat surfaces.
The key here is prep. Clean the surface thoroughly and let the adhesive cure before using it. Good option for leased vehicles. When you are turning in the lease, review our guide to removing adhesive mounts from your dash.
3. Magnetic Mic Mounts (Easiest to Use)
Magnetic mounts are all about convenience. Instead of sliding the mic into a slot, you just bring it close to the mount and it snaps into place.
This is by far the easiest option while driving and works especially well if you frequently grab and rehang the mic. It’s another good option for leased vehicles. Be sure the adhesive has ample time to settle, at least 24 hours and don’t install it when the car is very cold.
Advanced Option: AMPS Mount Integration
If you want a more customized setup, some mic holders can attach to an AMPS mounting system.
This opens up a lot of possibilities. You can mount your mic:
- On a seat bolt mount
- On a dash arm system
- Even in a cup holder mount setup
This is the most flexible option, but it requires choosing compatible components.
Common Mistakes
- Mounting too far from reach
- Blocking vents or controls
- Using weak adhesive on textured surfaces
- Ignoring airbag zones
- Mounting too low where you can’t see it
Bottom Line
If you want the simplest and most secure option, go with a screw-in mount. If you don’t want to drill, use an adhesive mount. And if ease of use matters most, a magnetic holder is hard to beat.
The right choice depends less on the radio and more on how you use it every day.
Now that you know where to put the mic, it’s a good time to scope out the best HAM radio mounts for a car or SUV.
