
One of the most overlooked problems with a HAM or CB radio install is simple: where does the mic go when you are not using it?
A lot of people just toss it on the passenger seat. That works, until you have a passenger. Then your mic is sliding around, falling on the floor, or getting in the way every time you brake. Setting it on top of the radio is not much better, especially when the radio is mounted low or tucked under the dash where it is hard to reach safely while driving.
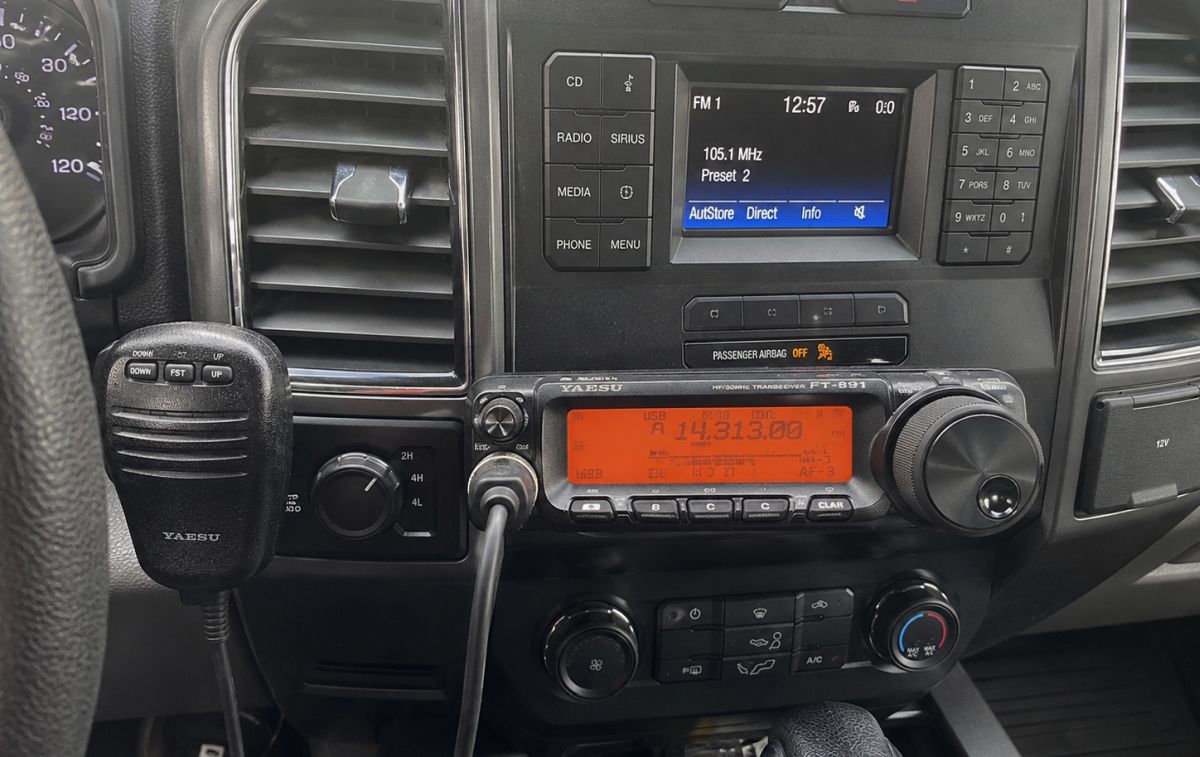
A proper mic holder solves this. A good setup keeps the mic within easy reach, easy to grab, and just as easy to put back, all without taking your eyes off the road for more than a glance. The good news is that the mounting hardware behind nearly every mic holder is the same: a small round button on the back of the microphone that slides into a slotted bracket. Once you understand that one detail, the rest of the decision comes down to how you want that bracket attached to your vehicle.
Mic Holder Comparison
| Mount | Best For | Years/Trim |
|---|---|---|
| UAYASOK Mic Hang-Up Clip | Permanent, drill or adhesive install | Universal, round-knob mics |
| HYS Magnetic Mic Mount | Fast one-handed grab and release | Universal, round-knob mics |
| Gear Keeper CB Mic Retractor | Keeping the mic tethered to the radio | Universal, clip or screw mount |
How Mic Holders Actually Work
Almost every HAM and CB radio microphone, whether it is a Yaesu, Icom, Kenwood, or a standard CB mic, has a small round mounting button on the back. That button slides into a groove or slot on the holder and locks into place. This design has been consistent across brands for decades, which is why compatibility is rarely the issue people expect it to be. The mount is not gripping or squeezing the mic body itself. It is locking onto that rear button, so as long as your mic has the button, nearly any standard holder will work with it.
1. Screw-In or Adhesive Hang-Up Clips (Most Secure, Lowest Cost)
This is the traditional solution and still the most reliable one. These holders attach either with two small screws or with a strong adhesive backing, and both versions use the same slotted bracket to catch the mic’s rear button. Screwed in, this becomes a permanent part of the vehicle that will not move or loosen over time. The tradeoff is that removing a screwed-in mount usually leaves small holes behind, so if your vehicle is leased, the adhesive version of the same bracket is the better call.
The key to a good adhesive install is prep. Clean the mounting surface thoroughly with isopropyl alcohol and let the adhesive cure for at least 24 hours before hanging the mic on it. If you are turning in a leased vehicle later, see our guide to removing adhesive mounts from your dash for a clean removal.
2. Magnetic Mic Mounts (Fastest to Use)
Magnetic mounts trade a small amount of cost for a real gain in convenience. Instead of lining the mic’s button up with a slot, you just bring the mic close to the mount and a metal plate on the back snaps into place. This is the easiest option to use while driving, especially if you are constantly grabbing and rehanging the mic throughout the day.
Most magnetic mic mounts still install with adhesive backing, so the same rules apply: clean the surface, and give the adhesive at least 24 hours to set before relying on it. Avoid installing it when the cabin is very cold, since the adhesive bonds best at moderate temperatures.
3. Retractable Mic Keepers (Best for Keeping the Mic Tethered)
A retractable mic keeper takes a different approach entirely. Instead of hanging the mic in a fixed spot, it tethers the mic to a reel mounted near the radio. Pull the mic out to talk, let go, and it retracts back to the radio on its own. This is a good option if your radio is mounted somewhere that a fixed hang-up clip would be awkward to reach, or if you simply do not want the mic resting against any surface when it is not in use.
These mounts typically use a clip or small screw-on bracket rather than a slotted button mount, so check that the keeper you choose is rated for the weight of your specific mic.
Advanced Option: Mounting a Mic on an AMPS-Compatible System
If you already have an AMPS mounting system in your vehicle for a GPS, tablet, or the radio’s control head, it is worth checking whether your mic holder has the same four-hole AMPS pattern on the back. Not every mic bracket does, but the ones that have it open up a lot of placement options, including a seat bolt mount, a dash arm system, or even a cup holder base.
This route takes more planning since you are matching compatible components rather than buying a single product, but it gives you placement flexibility that a fixed hang-up clip cannot. If you are building out a full radio setup rather than just the mic, our guide to RAM Mounts for HAM radios walks through how the ball, arm, and base components fit together.
Common Mistakes to Avoid
The biggest mistake is mounting the mic somewhere that requires looking away from the road to hang it back up. Beyond that, watch for a few other recurring problems: mounting the holder too far from a natural reach, placing it where it blocks a vent or control, using adhesive on a textured or curved surface where it will not bond properly, mounting too close to an airbag zone, and mounting it low enough that you cannot see it without looking down.
Bottom Line
If you want the simplest and most secure option, go with a screw-in or adhesive hang-up clip. If speed matters more than anything, a magnetic mount is hard to beat. And if you would rather keep the mic tethered directly to the radio instead of mounting it in a fixed spot, a retractable keeper solves that differently than either of the other two.
The right choice depends less on the radio itself and more on how you actually use it day to day. Once your mic has a home, it is worth revisiting the rest of the install. Our guide to mounting a HAM radio in a car or SUV covers every option for the control head and radio body itself.