
Whether you’re scouting deer movement, watching a food plot, or filming your own hunt from a tree stand, getting a camera mounted solidly to a tree is the first problem to solve. The method you pick to mount a camera to a tree affects how long the camera stays put, how much you can adjust the angle, whether it’s allowed on the land you’re hunting, and how easy it is for someone else to walk off with it.
| Mount | Best For | Type |
|---|---|---|
| Aothaigro Trail Camera Bracket & Strap Mount | Public land, quick moves, no tree damage | Strap |
| HME Better Camera Holder | Private land, long-term, windy spots | Screw-in |
| Fourth Arrow Stiff Arm Camera Mount | Self-filming bow hunts | Arm |
Method 1: Strap Mounts
The strap is the most common way to mount a trail camera, and most cameras ship with a basic one included. You thread it through the slot on the back of the housing and cinch it around the tree. It’s simple, fast, and leaves no mark on the bark.
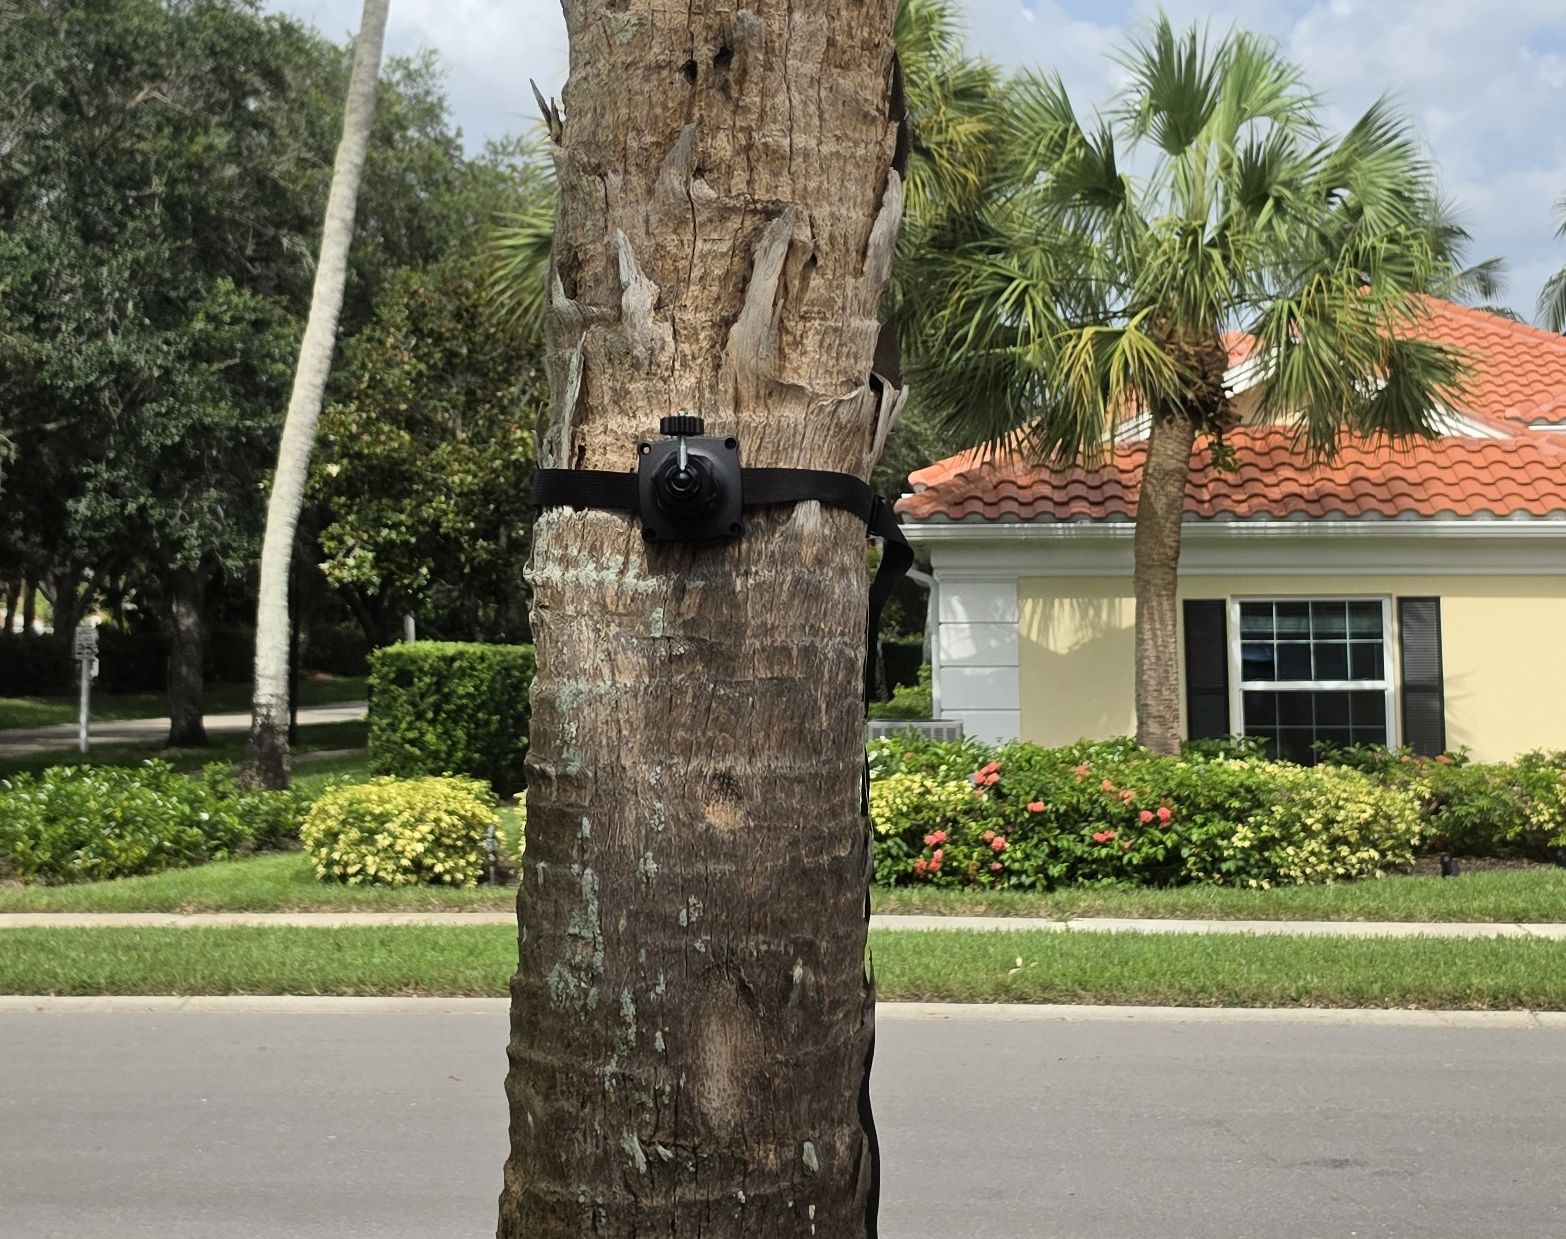
The catch with a bare strap is angle adjustment. Cinched flush against the trunk, the camera points wherever the tree is facing. If the game trail runs at an angle to that tree, you’re stuck picking a different spot or shimming the back of the camera with a stick to tilt it. This is why a bracket-and-strap combo is worth the upgrade over a plain strap. The mount in the photo above, the Aothaigro Trail Camera Bracket and Strap Mount, gives you a metal bracket with 360-degree rotation and 90 degrees of tilt, sitting between the strap and the camera. You get the no-damage, fast-install benefit of a strap along with real angle control, without needing to find a tree that already faces the right direction. It comes as a complete kit: bracket, strap, and mounting screws, and works with any camera that has the standard 1/4″-20 thread on the bottom.
Straps are the go-to for public land, where screw-in mounts are often prohibited or frowned upon. They’re also the right call if you’re moving cameras frequently between spots, since installation and removal takes under a minute.
Best for: Public land, frequent camera moves, situations where you want zero tree damage.
Method 2: Screw-In Tree Mounts
A screw-in mount threads directly into the bark, giving you a rock-solid platform that doesn’t shift in wind or weather. Most use a self-tapping lag screw on one end and a standard 1/4″-20 threaded connection on the other, the same pattern used on tripods and on the bottom of nearly every trail camera. A ball-and-socket head lets you dial in the angle before locking it down.
Installation is easy: press the screw tip against the bark and twist by hand, no tools needed for most designs. For harder wood, drilling a pilot hole first makes it go in cleaner. Use as much thread depth as you can, since a shallow bite in the bark won’t hold over time.
The HME Better Camera Holder is an all-steel design with a 360-degree swivel head and full vertical tilt, built for exactly this kind of long-term placement. It’s the mount we point to most often for hunters who want to set a camera once and not think about it again for weeks.
Best for: Private land, long-term camera placements, windy locations, any situation where you want to set it and move on.
Method 3: Camera Arms for Filming Hunts
If you’re filming your own hunts from a stand, bowhunting especially, a camera arm is a different category of mount entirely. These aren’t trail camera accessories; they’re built to hold a camcorder or mirrorless camera steady while you’re sitting and waiting for a shot.
A camera arm clamps or straps to the tree and extends outward, positioning the camera off to the side so it doesn’t interfere with your draw. The arm articulates, letting you swing the camera toward the action when an animal comes in and lock it down for the shot. The goal is stable, hands-free footage, so you’re never holding the camera when the moment happens.
The Fourth Arrow Stiff Arm Camera Mount is one of the most widely used arms among hunting content creators. It mounts with a ratchet strap rather than a screw, which keeps it legal on public land, and it holds up to ten pounds, enough for a full-size camera with a long lens. Tool-less leveling makes it fast to set up quietly in the stand. If you’d rather run a GoPro for this instead of a dedicated camcorder, our GoPro hunting mounts guide covers that setup in more detail.
Best for: Self-filming bow hunts, filming a hunting partner, anyone creating hunting content who wants stable footage without a dedicated camera operator.
Not needed for: Basic trail camera scouting. A strap or screw-in mount handles that fine.
Camera Placement: Height, Angle, and Direction
The mount is only part of the equation. Where and how you aim the camera matters just as much.
Height: For trail cameras watching deer, waist height, roughly two to three feet off the ground, is the standard starting point. Deer aren’t much taller than a person, so a camera at that height captures the whole animal walking through frame. Mount it higher and you’re shooting down at its back; too low and you catch legs and belly. The exception is a scrape or licking branch, where you want the camera closer to head height.
Mounting high, ten to fifteen feet up, is sometimes done to cut theft risk and avoid spooking deer at eye level. At that height you’ll want a screw-in mount with strong tilt adjustment so you can angle the camera back down toward the trail.
Angle: Tilt the camera slightly downward. Pointed straight ahead, it often catches sky in the upper part of the frame, wastes trigger distance on empty background, and can miss animals walking close to the base of the tree.
Direction: Keep the sun at the camera’s back if you can. A camera facing east gets direct morning sun in the lens, washing out images during the exact hours deer are most active. Facing north or south avoids backlighting through the day.
Distance from the trail: Most trail cameras trigger best between ten and twenty feet from the target zone. Closer than that, fast-moving deer exit frame before the image captures. Farther out, the animal is a small blob in the background.
Keeping Your Camera From Getting Stolen
Camera theft is a real problem, particularly on public land and in areas with heavy foot traffic. Mounting higher on the tree, eight to twelve feet, takes the camera out of casual reach. Combined with a steel security cable, it makes removal genuinely difficult without a ladder. We cover the cable-and-lock options in detail, along with ground stake and gate-mount alternatives for spots with no usable tree, in our trail camera mount roundup.
Some hunters go further with security boxes: steel enclosures that bolt directly to the tree and lock with a padlock. These protect against both theft and bear damage, since bears are notorious for pawing at trail cameras. On public land, the most effective theft prevention is still the simplest: don’t leave cameras out for extended stretches. Check and rotate every one to two weeks rather than leaving them all season.
FAQ: How to Mount a Camera to a Tree
Do I need to drill a hole for a screw-in mount?
Not usually. Most screw-in mounts twist into bark by hand. A pilot hole helps in hardwood or with longer screws, but it isn’t required on most trees.
Is a screw-in mount legal on public land?
It depends on the specific state or federal land. Many public tracts prohibit driving hardware into trees, so a strap mount is the safer default unless you’ve confirmed the rules for your unit.
How high should I mount a trail camera?
Waist height, around two to three feet, works for most deer scouting. Go higher, eight to fifteen feet, if theft is a concern, and pair it with a mount that has strong downward tilt.
Can I use a camera arm for a regular trail camera?
You can, but it’s overkill. Camera arms are built for self-filming with a camcorder or mirrorless body from a stand. A strap or screw-in mount is simpler and cheaper for basic scouting.