
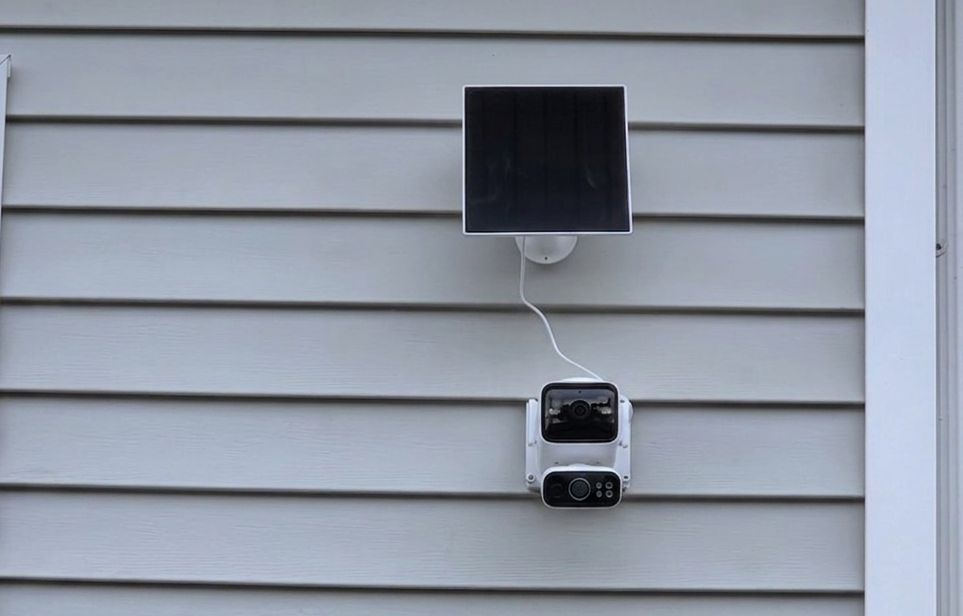
The Tapo C675D is the solar-powered version of TP-Link’s dual-lens outdoor camera, pairing a 169-degree fixed wide lens with a 6mm pan and tilt telephoto lens, all running on a 10,000mAh battery topped off by the included A202 solar panel. Mounting this one is a two-part job. The camera body uses its own wall bracket, and the A202 solar panel mounts separately on its own bracket, connected by a cable. That split actually works in your favor once you plan for it, since the panel does not need to face the same direction as the camera, but it does mean this guide covers two different mounting jobs rather than one. Below are the best Tapo C675D mounts for the camera body itself, plus two solar panel mounts for getting the A202 panel into direct sun even when the ideal camera position is not.
| Mount | Best For | Mounts |
|---|---|---|
| HOLACA Vinyl Siding Mount | Camera on vinyl siding, no drilling | Camera Body |
| Koroao Gutter Mount | Camera height without touching siding or fascia | Camera Body |
| HOLACA Outside Corner Mount | Camera coverage of two sides from one corner | Camera Body |
| Didalo Gutter Mount | Positioning the A202 panel for sun the camera spot does not get | Solar Panel |
| HOLACA Siding Hook Mount | Panel placement on siding without drilling | Solar Panel |
Mounting the C675D Camera Body
The camera body itself uses the same dual-lens bracket footprint as the wired C575D, so the same three mounts apply here for vinyl siding, gutter, and outside corner placement.
HOLACA Vinyl Siding Mount
Clips onto a standard siding panel lap with no drilling, holding the C675D’s own bracket in place. This is the option to reach for when the camera’s ideal position falls on a flat run of siding and you want the install to stay reversible.
Koroao Gutter Mount
Clamps to the gutter lip with no drilling into the fascia, giving the camera a higher vantage point for driveways and wide yards. Keep in mind this is one of two cable runs you will manage on this camera, so plan the route before you commit to the spot.
HOLACA Outside Corner Mount
Wraps a standard 90-degree exterior corner, letting the C675D’s wide lens take in both sides of the house while the pan and tilt lens zooms in on whichever side has activity. A strong option when one camera needs to cover two sightlines.
Mounting the A202 Solar Panel
The A202 panel ships with its own adjustable bracket, and for a lot of installs that stock bracket next to the camera is all you need. But the real advantage of the C675D’s separate panel design is that it does not have to sit next to the camera or face the same direction. If your camera position is a decent viewing angle but a poor sun trap, shaded by a roofline or facing north, these two mounts let you put the panel somewhere that actually gets sun and run the cable to it instead.
Didalo Gutter Mount for Solar Panel
A 360-degree adjustable gutter clamp built for compact solar panels, sold as a two-pack. It hangs on the gutter lip with no drilling and lets you angle the panel independently of the camera. Useful when the roofline gets more consistent sun than the wall the camera is mounted to.
HOLACA Siding Hook Mount for Solar Panel
Hooks onto a siding seam with no drilling and no tools, giving the panel a stable, adjustable position on the same wall as the camera or a different one entirely. This is the simpler option when the panel just needs to move a few feet from the camera to clear a shadow line.
Why the C675D Needs Two Separate Mounting Decisions
Most Tapo solar cameras, including the C645D and C660, use a single integrated bracket that positions the camera and solar panel together as one unit. One mounting footprint, one set of holes. The C675D breaks from that pattern: the camera body and the A202 panel each get their own bracket, connected by a cable rather than sharing hardware. It is a real step up in mounting flexibility once you plan around it, but it does mean two decisions instead of one.
Getting Enough Sun to the A202 Panel
The A202 panel needs about 90 minutes of direct sunlight a day to keep the 10,000mAh battery topped off under normal use. That is not a lot, but it has to be direct sun, not filtered daylight through a tree canopy or a covered porch. Before you settle on a permanent mount, track the sun path across your intended panel location for a full day if you can. South-facing positions in the northern hemisphere are the safe default, but a corner of the house that gets strong afternoon sun can work just as well even if it does not face due south.
The included extension cable gives you roughly 13 feet of separation between the camera and the panel, which is enough room to move the panel to an entirely different wall, around a corner, or up onto a gutter line if that is where the sun actually lands. Both mounts covered above are built to work with that flexibility rather than force the panel to sit right next to the camera.
Matching the Mount Combination to Your Yard
Since this camera involves two mounting decisions, it helps to think through a few common layouts before you buy anything. If your house has a clear south or west-facing wall that also happens to be a good camera angle, you likely do not need any of the mounts above and can rely entirely on the included brackets. That is the simplest install and worth trying first.
If the best camera angle is on a shaded or north-facing wall, plan on separating the two. A common combination is the corner mount for the camera, since corners tend to give the widest useful coverage, paired with the gutter mount for the solar panel on whichever roofline actually catches sun through the day. Another common pairing is the siding mount for the camera at a lower, less conspicuous position, with the panel moved up to a gutter mount higher on the same wall where it clears any overhang shadow. There is no single right combination. It comes down to walking your specific exterior and noting where the sun actually lands versus where you want the camera pointed.
Tapo C675D Mounts FAQ
Do I need both a camera mount and a solar panel mount?
Not necessarily. If the stock bracket position works for both the camera view and the panel’s sun exposure, you can use the included hardware for both and skip the aftermarket mounts entirely. These mounts solve the problem when one location works for the camera but not the panel, or vice versa.
Can I extend the cable further than the included length?
The included extension wire runs about 13 feet. TP-Link does not officially support daisy-chaining multiple extension cables, so if you need more distance than that between the camera and the panel, plan your mounting positions within that range.
Does the C675D need PoE like the C575D?
No. The C675D runs entirely on its battery and solar panel, with no PoE or DC adapter option. If you have Ethernet access at your mounting location and would rather skip solar planning altogether, the wired C575D uses the same dual-lens system on a single bracket.
Will these solar panel mounts work with the A200 or A201 panel too?
Both mounts rely on a universal 1/4-20 threaded connection rather than anything specific to the A202, so they should work the same way with the A200 or A201 panels if you already own one of those instead.
Does moving the panel away from the camera hurt charging performance?
No, as long as the panel itself is getting direct sun. The connection is just a power cable, so distance within the extension cable’s range does not reduce charging efficiency. What matters is the panel’s own exposure, not its distance from the camera.
Can the corner mount be used for the solar panel instead of the camera?
The corner mount listed above is built for the camera’s dual-lens bracket, not the panel’s mounting interface, so it is not a fit for the A202. If you need a corner position for the panel specifically, the siding hook mount can often be adapted to a corner trim piece depending on your home’s exterior.
Related Reading
For the wired version of this camera, see our guide to Tapo C575D mounts, which uses the same camera bracket without the solar panel considerations. For a full breakdown of how this camera performs day to day, our sister site HomeCamCafe has a detailed Tapo C675D review covering video quality, detection range, and the solar setup in practice.