
Choosing between Ring Outdoor Cam Plus mounts starts with the installation surface. The stock bracket works for a conventional wall or ceiling, but vinyl siding, gutters, poles, fences, and ground-level placements need different hardware. These five options cover the useful alternatives without pretending that one bracket is best for every house.
Adding cameras elsewhere around the property? Our security camera mount hub organizes installation guides by brand and model.
Best Ring Outdoor Cam Plus Mounts Compared
| Mount | Installation | Best For |
|---|---|---|
| Adjustable Wall Mount, 2-Pack | Screw-mounted wall or ceiling bracket | Best overall permanent mount |
| Holicfun Gutter Mount | No-drill gutter clamp | Driveways and elevated coverage |
| Wasserstein 2-in-1 Pole Mount | Strap-mounted pole or post bracket | Camera and solar-panel installations |
| Aobelieve Vinyl Siding Mount | No-drill siding-seam clip | Compatible vinyl and aluminum siding |
| Holicfun Stake Mount with Cover | Ground stake | Ring Outdoor Cam Plus Battery only |
Where to Mount a Ring Outdoor Cam Plus
The best location provides a clear approach view, dependable Wi-Fi, access to power when needed, and enough shelter to reduce glare and direct weather exposure. Start with the area you need to monitor, then choose the mount that works with the available surface.
Exterior wall: A wall near a garage, side entrance, patio, or gate usually provides the most stable long-term installation. It is also the easiest location for routing a plug-in cable through a protected path.
Under an eave or soffit: The Outdoor Cam Plus can be mounted overhead, but confirm that the selected bracket supports ceiling placement. Keep the camera far enough from the wall that the housing and night vision are not obstructed.
Gutter: A gutter clamp creates an elevated view without holes in siding or fascia. The gutter must be secure and in good condition. Do not attach a camera to a loose, bent, or heavily corroded section.
Vinyl siding seam: A siding clip is useful when drilling is prohibited, but it must match the siding profile. Vinyl siding itself is not structural, so do not improvise by driving a screw only into the thin panel.
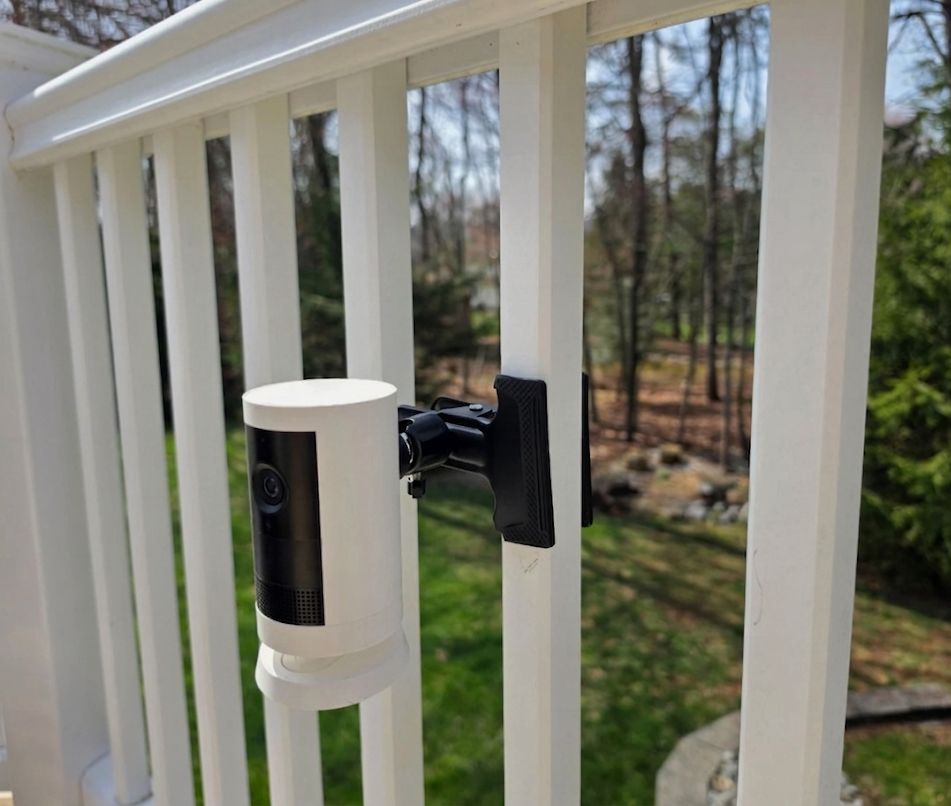
Pole, fence post, or railing: A strap-style pole bracket works when the useful camera position is away from the house. Check the supported pole diameter and make sure the straps cannot slide on a tapered or slick surface.
Soft ground: A purpose-built stake can cover a garden, path, detached structure, or temporary trouble spot. It is intended for soil, not concrete, compacted stone, or locations where lawn equipment will strike it.
1. Adjustable Wall Mount: Best Overall
This two-pack is specifically listed for the Ring Outdoor Cam Plus and Ring Stick Up Cam. The ball-joint design provides more aiming freedom than a fixed bracket, making it useful for a driveway, side path, gate, or corner where the camera needs to look across the wall rather than directly away from it.
Use solid backing or the correct anchor for the wall material. A bracket is only as secure as the fastener holding it. When installing overhead, tighten every adjustment point and test the camera position before routing a plug-in cable permanently.
This is the best general recommendation because it provides a stable mechanical attachment and does not depend on a gutter, siding seam, pole, or patch of soil. The package contains two mounts, which is useful for a second camera or a spare installation point.
2. Holicfun Gutter Mount: Best Elevated No-Drill Option
The Holicfun mount clamps to a rain gutter with thumb screws, so it can create a higher viewing position without drilling into fascia or siding. Its adjustable head is useful above garages and driveways, where a low wall location may be blocked by vehicles or landscaping.
The manufacturer describes this as a universal outdoor-camera gutter mount and supplies Ring adapters. Because it is not molded only for the Outdoor Cam Plus, compare the included connection hardware with your camera before ordering. Also check the gutter itself. A secure clamp cannot compensate for a loose gutter hanger or damaged metal.
Gutter placement makes later adjustments easy, but it also leaves the camera more exposed to wind and roof runoff. Position the mount away from a downspout inlet or a roof valley that concentrates water. Leave enough clearance to remove the camera or battery without disturbing the gutter.
3. Wasserstein 2-in-1 Pole Mount: Best for a Camera and Solar Panel
The Wasserstein bracket is designed to hold a security camera and a solar panel on the same pole-style installation. That can solve two placement problems at once: the camera can face the approach path while the panel is aimed toward stronger sunlight.
This is a universal bracket listed for Ring and several other camera brands, not an Outdoor Cam Plus-specific shell. Confirm the camera connection and solar-panel hardware before installation. The mounting straps also need a rigid pole or post within the supported size range. A thin decorative railing or flexible downspout may not provide enough resistance to wind.
Pole mounting works well for a fence line, detached shed, gate, deck post, or another area where the house is not the best vantage point. Route the solar cable with a drip loop and enough slack for camera adjustment, then secure it so wind cannot repeatedly pull it against the bracket.
4. Aobelieve Vinyl Siding Mount: Best for Siding
The Aobelieve mount clips into a compatible vinyl or aluminum siding seam without drilling. Its current listing includes the Ring Outdoor Cam Plus in battery, solar, and plug-in configurations, along with several related Ring cameras and solar panels.
This is a good choice when you want to avoid holes or test a location before committing to a permanent bracket. It is not universal across every siding profile. Inspect the seam shape, panel condition, and available clearance before ordering. Do not force the clip into brittle siding or use it on a loose panel.
For a plug-in camera, plan the cable route before choosing the final seam. The cable should not be pinched behind siding, stretched across a walkway, or positioned where water can follow it toward a connector. For a solar setup, confirm that the panel can receive useful sunlight without pulling on the camera mount.
5. Holicfun Stake Mount: Best for Yards and Gardens
This Holicfun stake is made specifically for the Ring Outdoor Cam Plus Battery. It includes an adjustable mount and a silicone birdhouse-style cover, with stackable sections that allow several installation heights. It does not claim compatibility with the plug-in version, so keep this recommendation limited to the battery camera named by the listing.
A ground stake is useful when the best view is across a path, garden, side yard, or detached structure rather than down from the house. It is also easier to relocate than a drilled wall bracket. Push it into stable soil and keep it away from irrigation heads, standing water, pets, children, and mowing equipment.
The lower placement can capture faces and animals at a useful angle, but it is easier to tamper with than a wall or gutter installation. Use it where the camera is visible from the property but not easily reached from a public sidewalk.
Mounting With a Solar Panel
Camera position and solar-panel position are related but not identical. The camera should face the area being monitored, while the panel needs useful daily sunlight. A 2-in-1 pole mount can let both devices rotate independently. With a wall, gutter, or siding installation, the panel may need its own nearby bracket.
Before fastening anything, hold the camera at the proposed location and check Live View, Wi-Fi strength, and motion coverage. Then evaluate the panel location at different times of day. A spot that looks sunny in the afternoon may remain shaded through most of the morning.
Keep the cable protected, create a drip loop before the connector, and do not leave excess cable where wind can whip it against siding or a gutter. Follow the panel manufacturer’s orientation and weatherproofing instructions.
Ring Outdoor Cam Plus Mounting Height and Angle
There is no single correct height for every property. Begin high enough to discourage tampering but low enough to preserve useful facial and vehicle detail. A position around 8 feet can be a reasonable test point for many exterior installations, but the walkway, driveway slope, distance to the subject, and nearby obstructions matter more than a fixed number.
Aim across the expected approach path instead of pointing only at the ground beneath the camera. After mounting, use Live View to check faces, vehicles, gates, and the edges of the detection area. Refine the motion zones after watching several real events rather than assuming the first angle is final.
Common Mounting Mistakes
- Choosing by brand name alone: Confirm the exact Outdoor Cam Plus power version and included adapter.
- Mounting too high: More coverage is not useful if faces become small and steeply angled.
- Trusting a weak surface: Loose gutters, brittle siding, flexible posts, and crumbling masonry can undermine a good bracket.
- Ignoring service access: Leave room to remove the battery, adjust the camera, clean the lens, and reach fasteners.
- Combining camera and solar placement blindly: The best viewing angle may not provide the best sunlight.
- Skipping the final app check: Test Live View, Wi-Fi strength, motion zones, and nighttime reflections after installation.
Bottom Line
The adjustable wall bracket is the strongest general-purpose choice among these Ring Outdoor Cam Plus mounts. Choose the Holicfun gutter mount when you need elevated no-drill placement, the Wasserstein bracket for a pole-mounted camera and solar panel, the Aobelieve clip for compatible siding, or the Holicfun stake when you own the battery model and need coverage away from the house.
Match the hardware to the camera version and mounting surface first. Then use Live View to refine the angle before completing the cable route or tightening every adjustment point.