 The Garmin Striker 4 and Striker 4cv was recently introduced to fill the lower priced market. When I compare the Garmin Striker 4 to what one would purchase a few years ago, it’s an amazing difference. Much more features for the price, color screen, smaller footprint plus a way lower cost.
Mount Analysis
From a pure mounting perspective, the Garmin Striker 4 and Striker 4cv are the same. From a feature point of view, the Striker 4cv has ClearVu technology which provides a more complete view of what’s below your boat. The better view comes at a higher price. If you are looking for the lowest price the Striker 4 is the way to go. Both will get the job done.
Installation typically requires use of two cables. One for power. The second for a transducer. It’s worth noting that the transducer is included with the Garmin Striker 4 and Striker 4cv. No need to spend more money. Everything is included.
Mount Recommendations
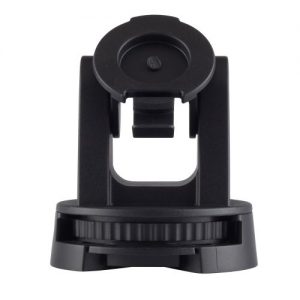
Both fishfinder models include the same mount. The Garmin Tilt/Swivel Mount for Striker 4 and Striker 4cv is what’s included with the device. That’s what you see in the photo that accompanies this article. It’s a typical flat surface mount. Drill some holes where it needs to go. Use some screws to attach the mount to the flat surface. The Garmin Striker 4 and Striker 4cv is portable in terms if being easily removed from the mount. Sure, you will need to disconnect the cables but after doing that, it’s simple to take the device with you when leaving the vessel. The device adapter is a bit similar to what we see on the Garmin vehicle GPS line.
Some want to take the mount with them as well. Hard to do when it’s screwed onto the boat. There are mounts that work in tandem with the included Garmin flat surface mount.
Consider the RAM Flat Surface Mount for the Garmin Striker 4 Series. This mount includes a round metal plate with holes, screws and nuts that line up to the bottom of the Garmin stock mount. This mount will project the Garmin Striker 4 upwards by roughly 3 inches beyond the stock mount. There are ball and socket adjustments at the base and adapter which permit angling the device closer for viewing. When leaving the boat, simply loosen the flywheel on the side of the three-inch arm, disconnect the cables, then take the entire setup with you. Both the mount and fishfinder can be removed simply leaving the round metal base attached to your boat.
The third type of mount to consider is the Garmin Flush Mount Kit for Striker 4 Series. This is the mount that is used for permanent and professional installation. You will need a large flat area on the boat. Installation entails careful measurement, a power jigsaw and a drill. The kit includes hardware, instructions and a template for installation. Make sure you are comfortable doing this sort of work on your boat or get a professional installer to do it for you. This type of installation has the disadvantage of being permanent. If you eventually decide to replace this fishfinder, you will still have a hole in the boat the shape of the installation template.
Summary
All three installation methods will work well for the Garmin Striker 4 and Striker 4cv. My favorite is the RAM mount because it facilitates complete portability plus the ability to easily port the mount over to a different fishfinder when it’s time to upgrade.
